

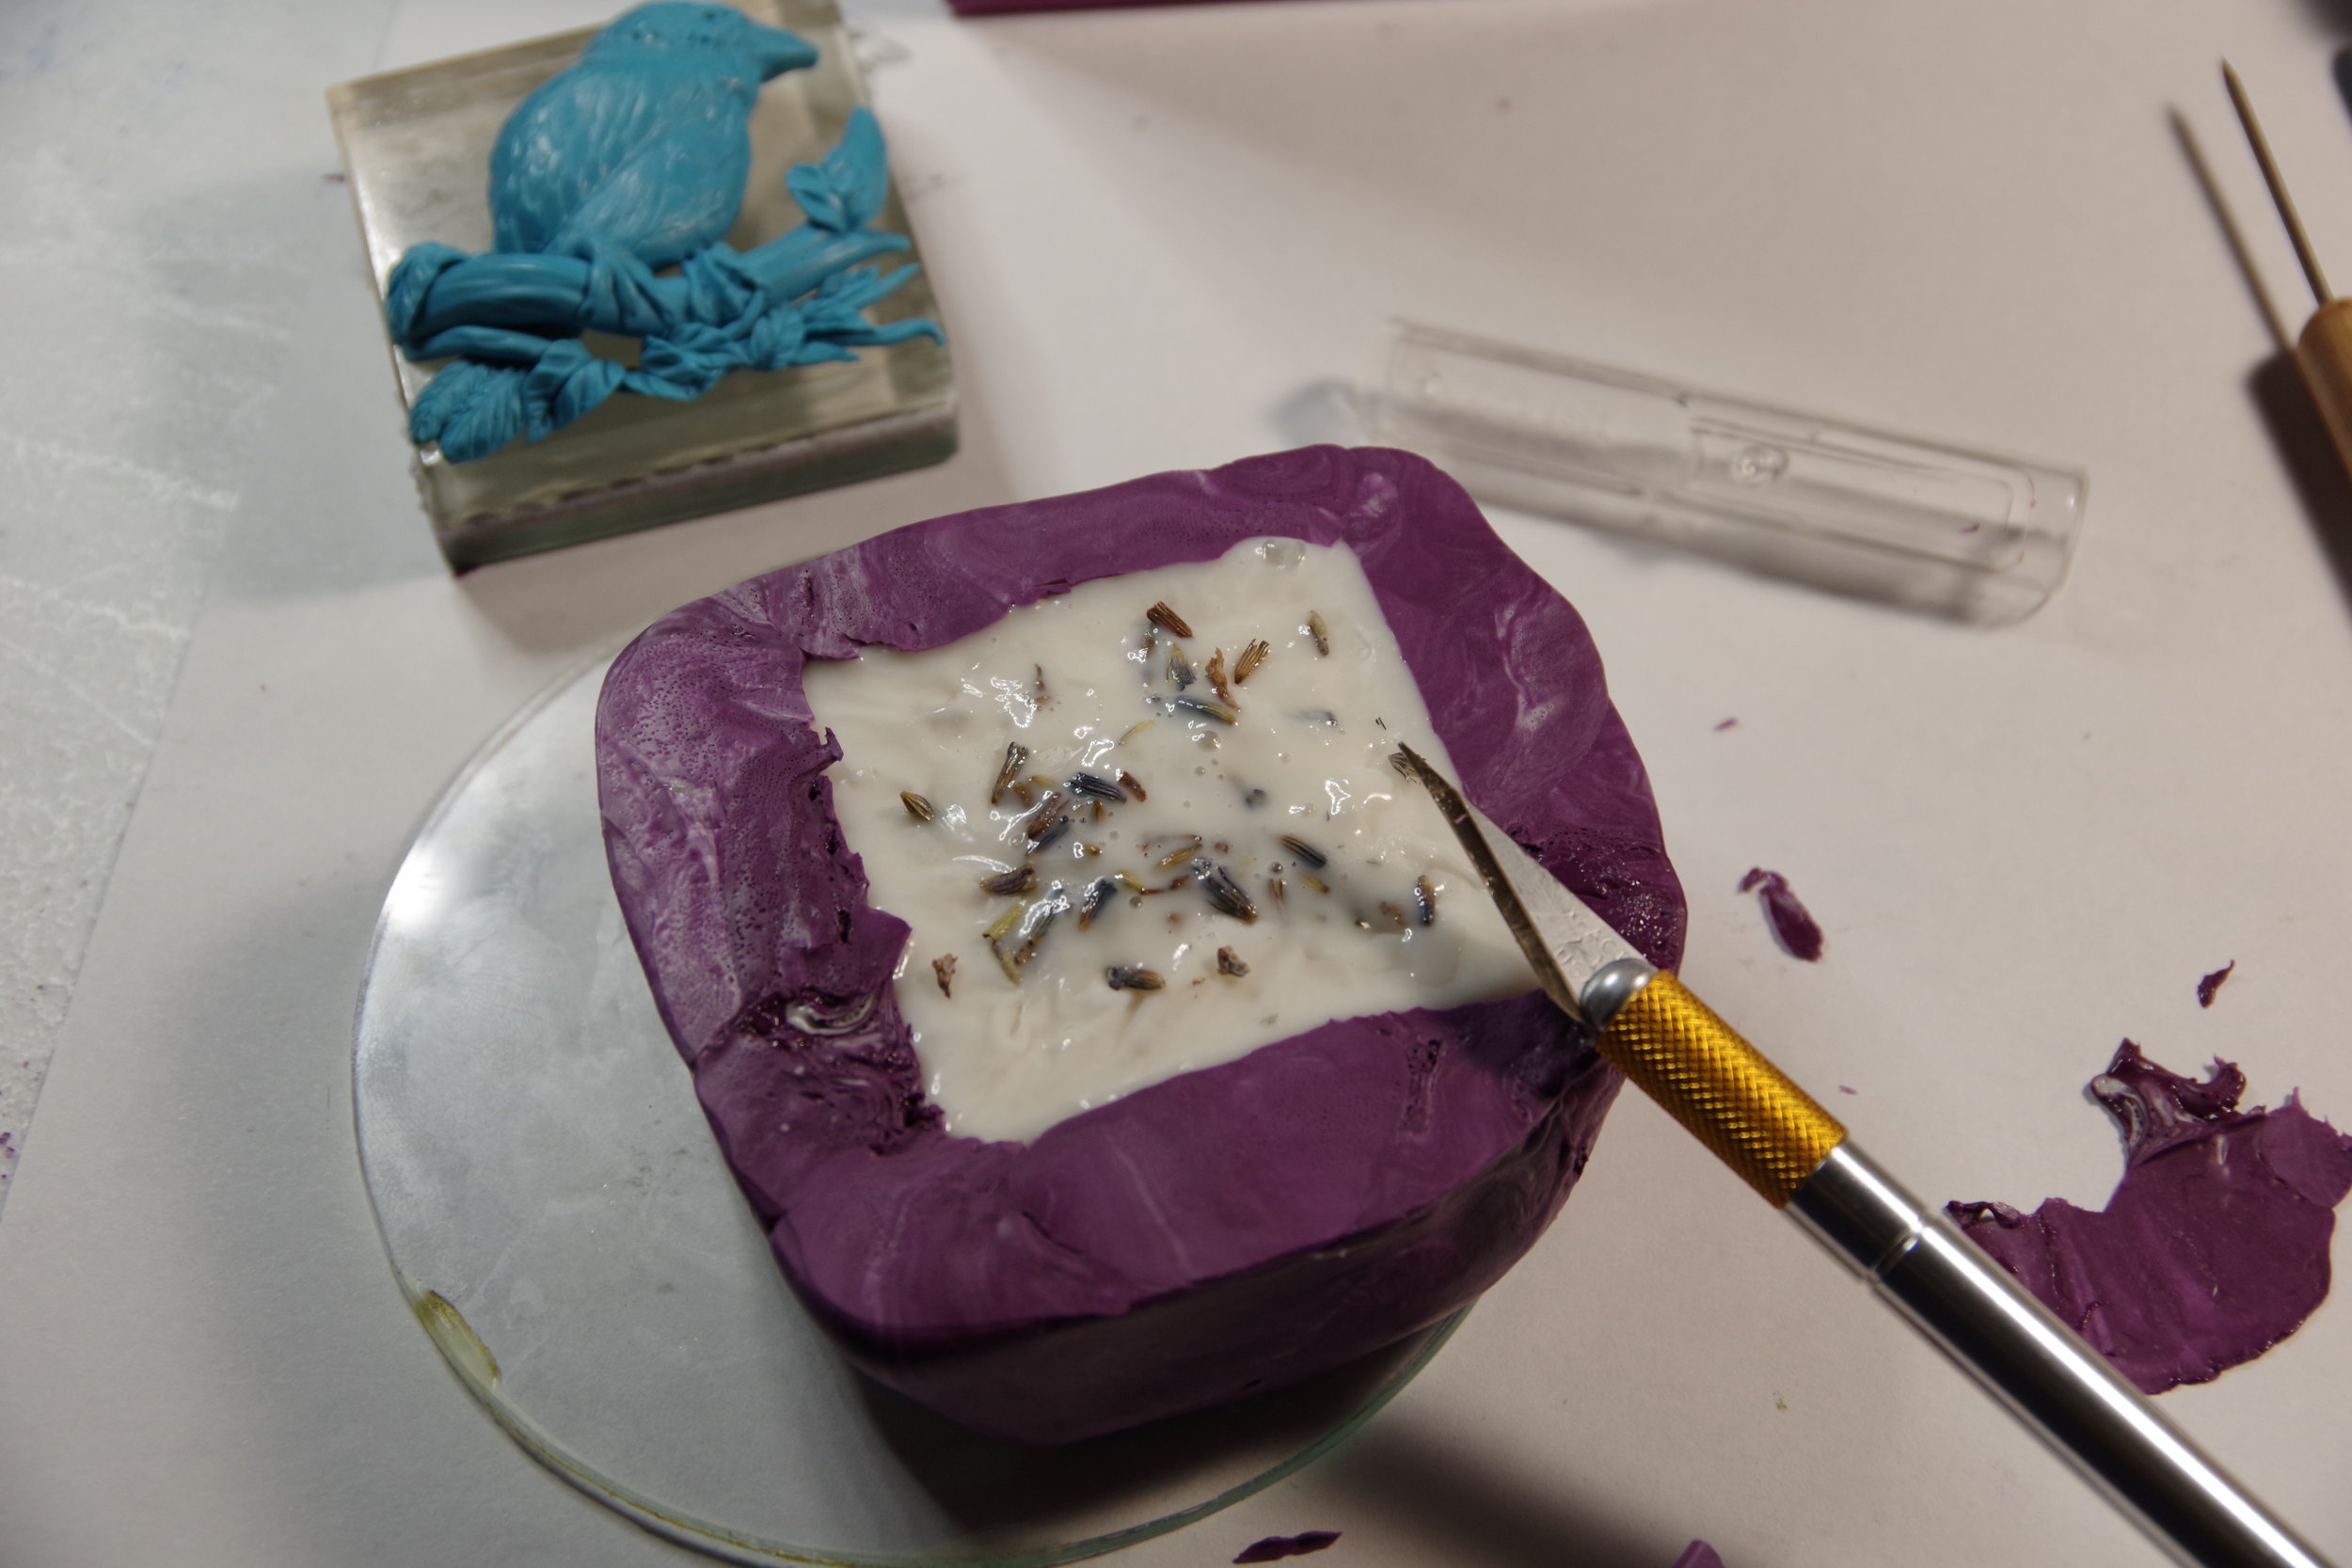
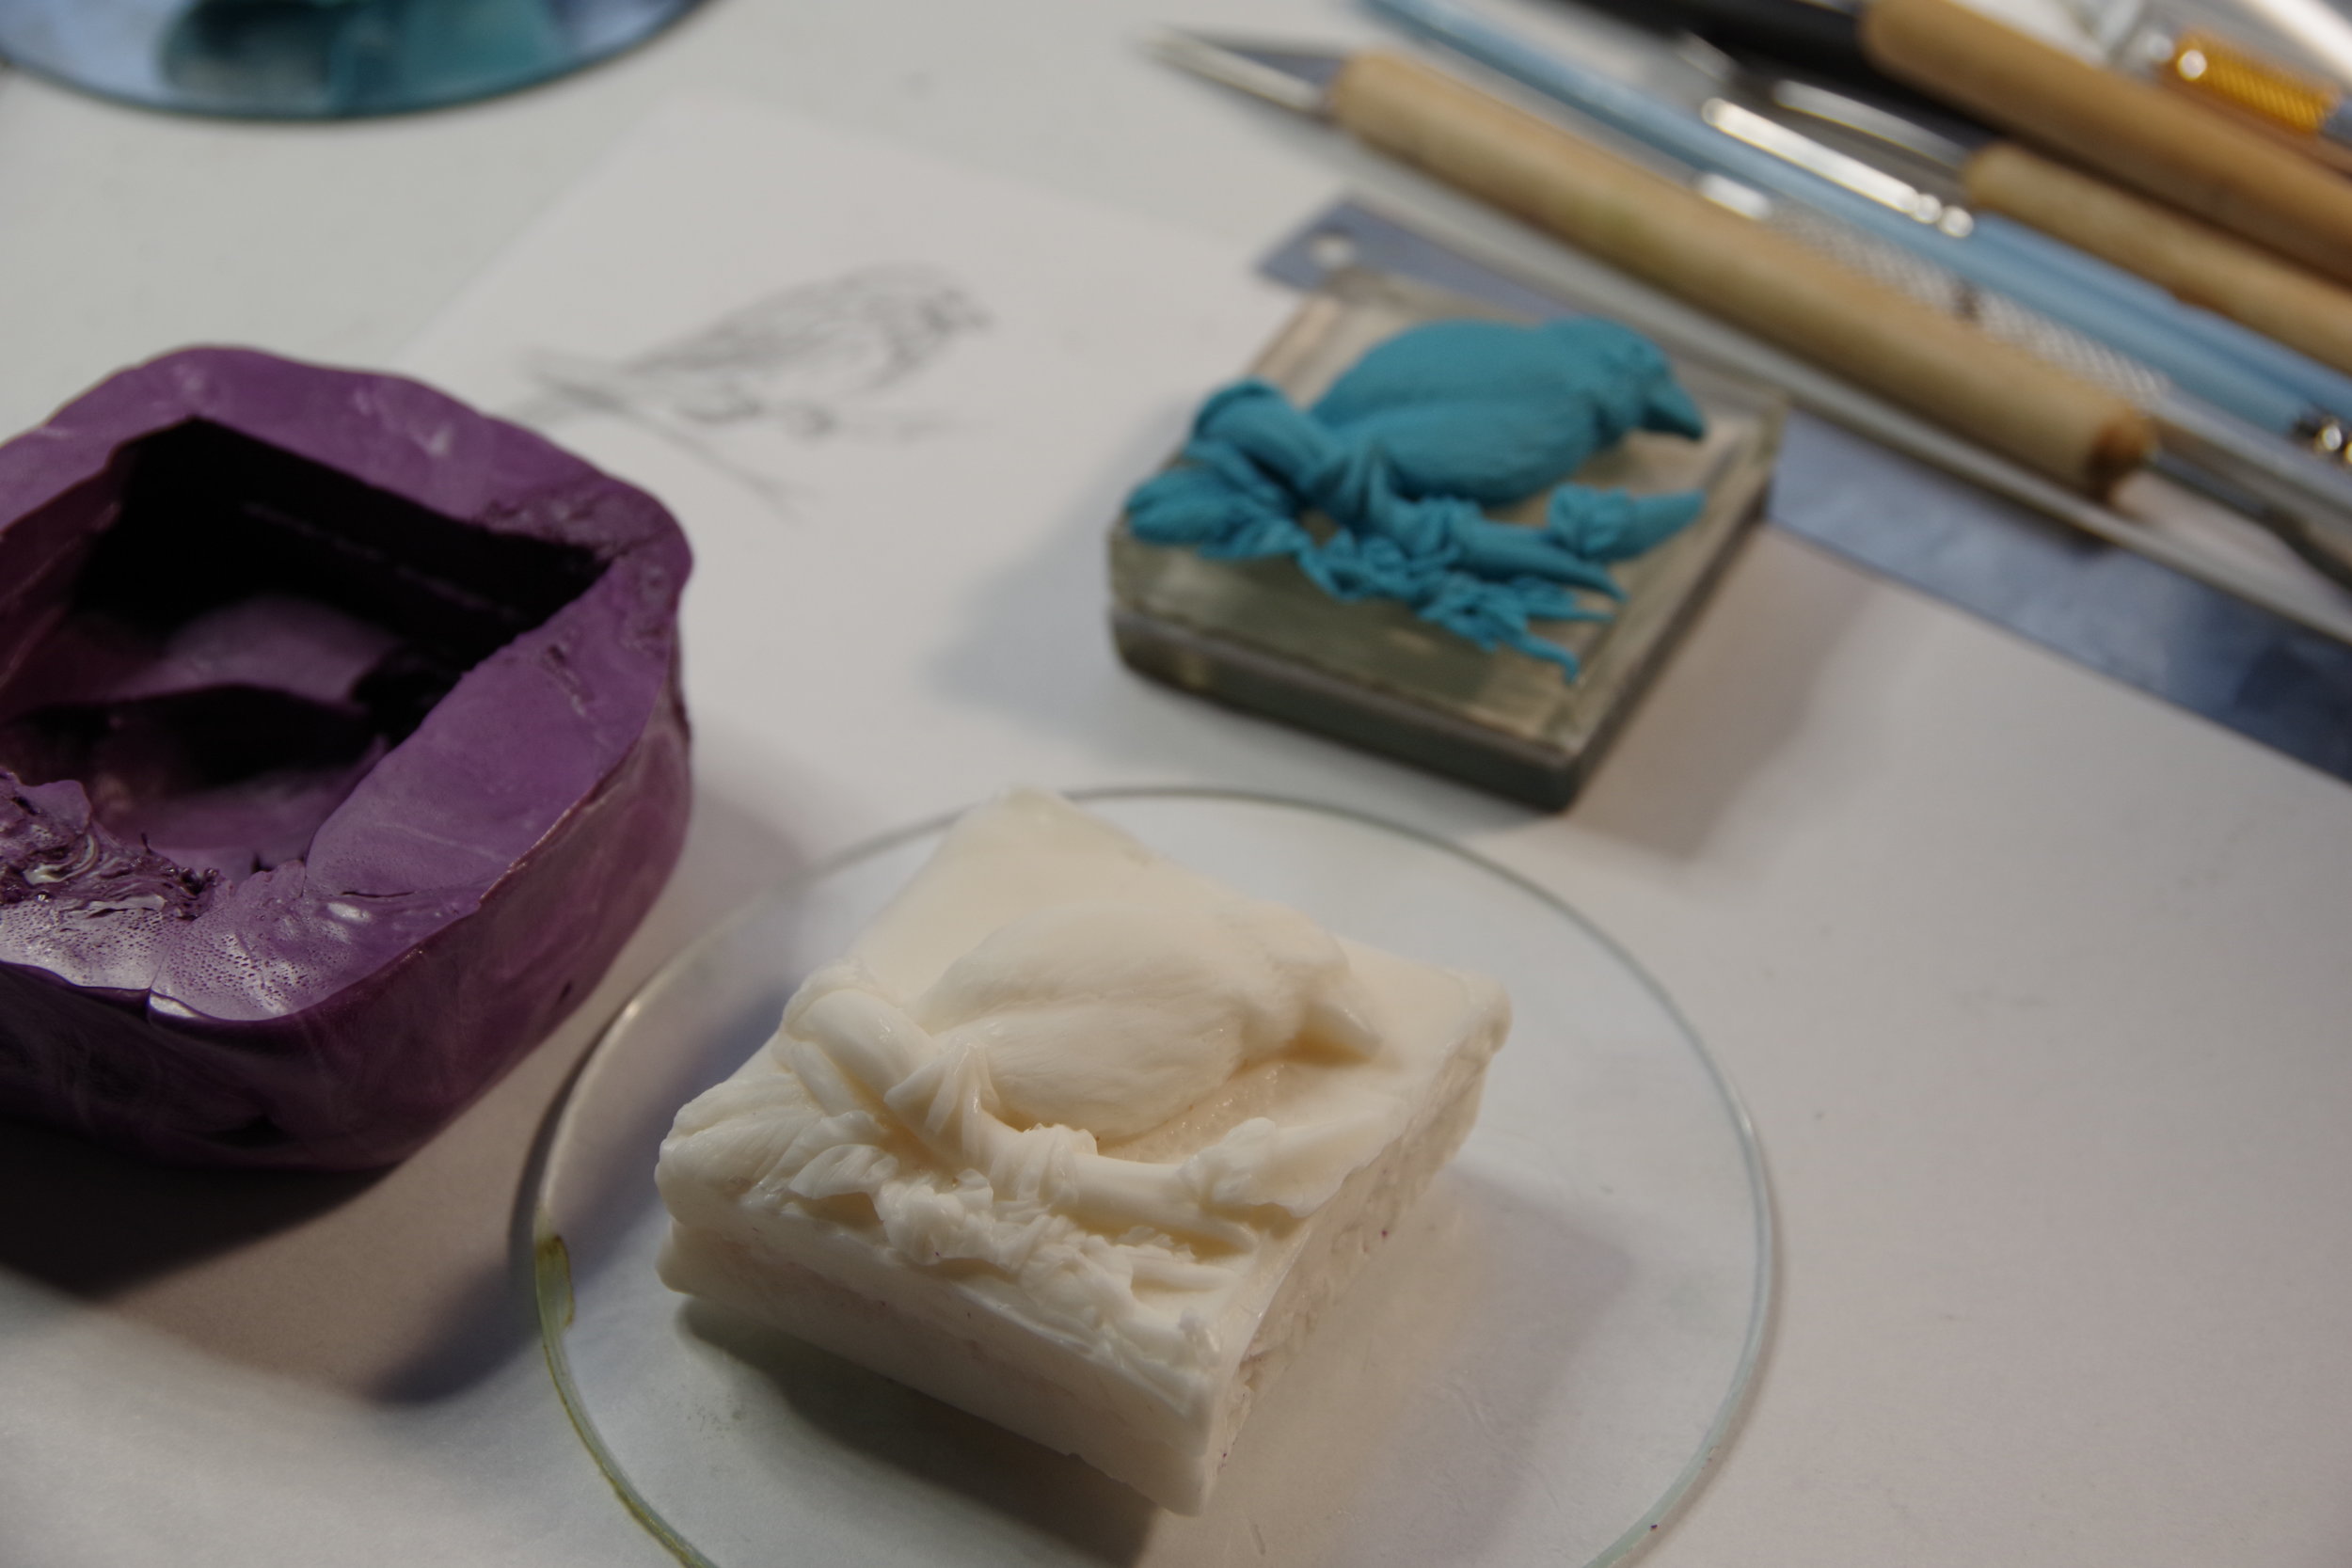
My original concept was for a neat, smooth, perfectly regular square accent soap, so I used tiles from the hardware store.
I have found that I rarely do my best work when I’m creating a tutorial. My concerns about lighting and clutter and camera angles and pausing to document every step along the way end up disrupting my normal process enough that I rarely get to show you the best of what I can do. Most of the time, this results in small errors that I can fix with a little extra work or just B+ pieces when I know that I’m capable of an A. In rare cases, I screw up so badly that I scrap the whole thing and don’t even write the tutorial at all. Yesterday, I thought that I would have to redo the last couple of steps of my most recent project, but I figured that I’d wait until this morning to decide.
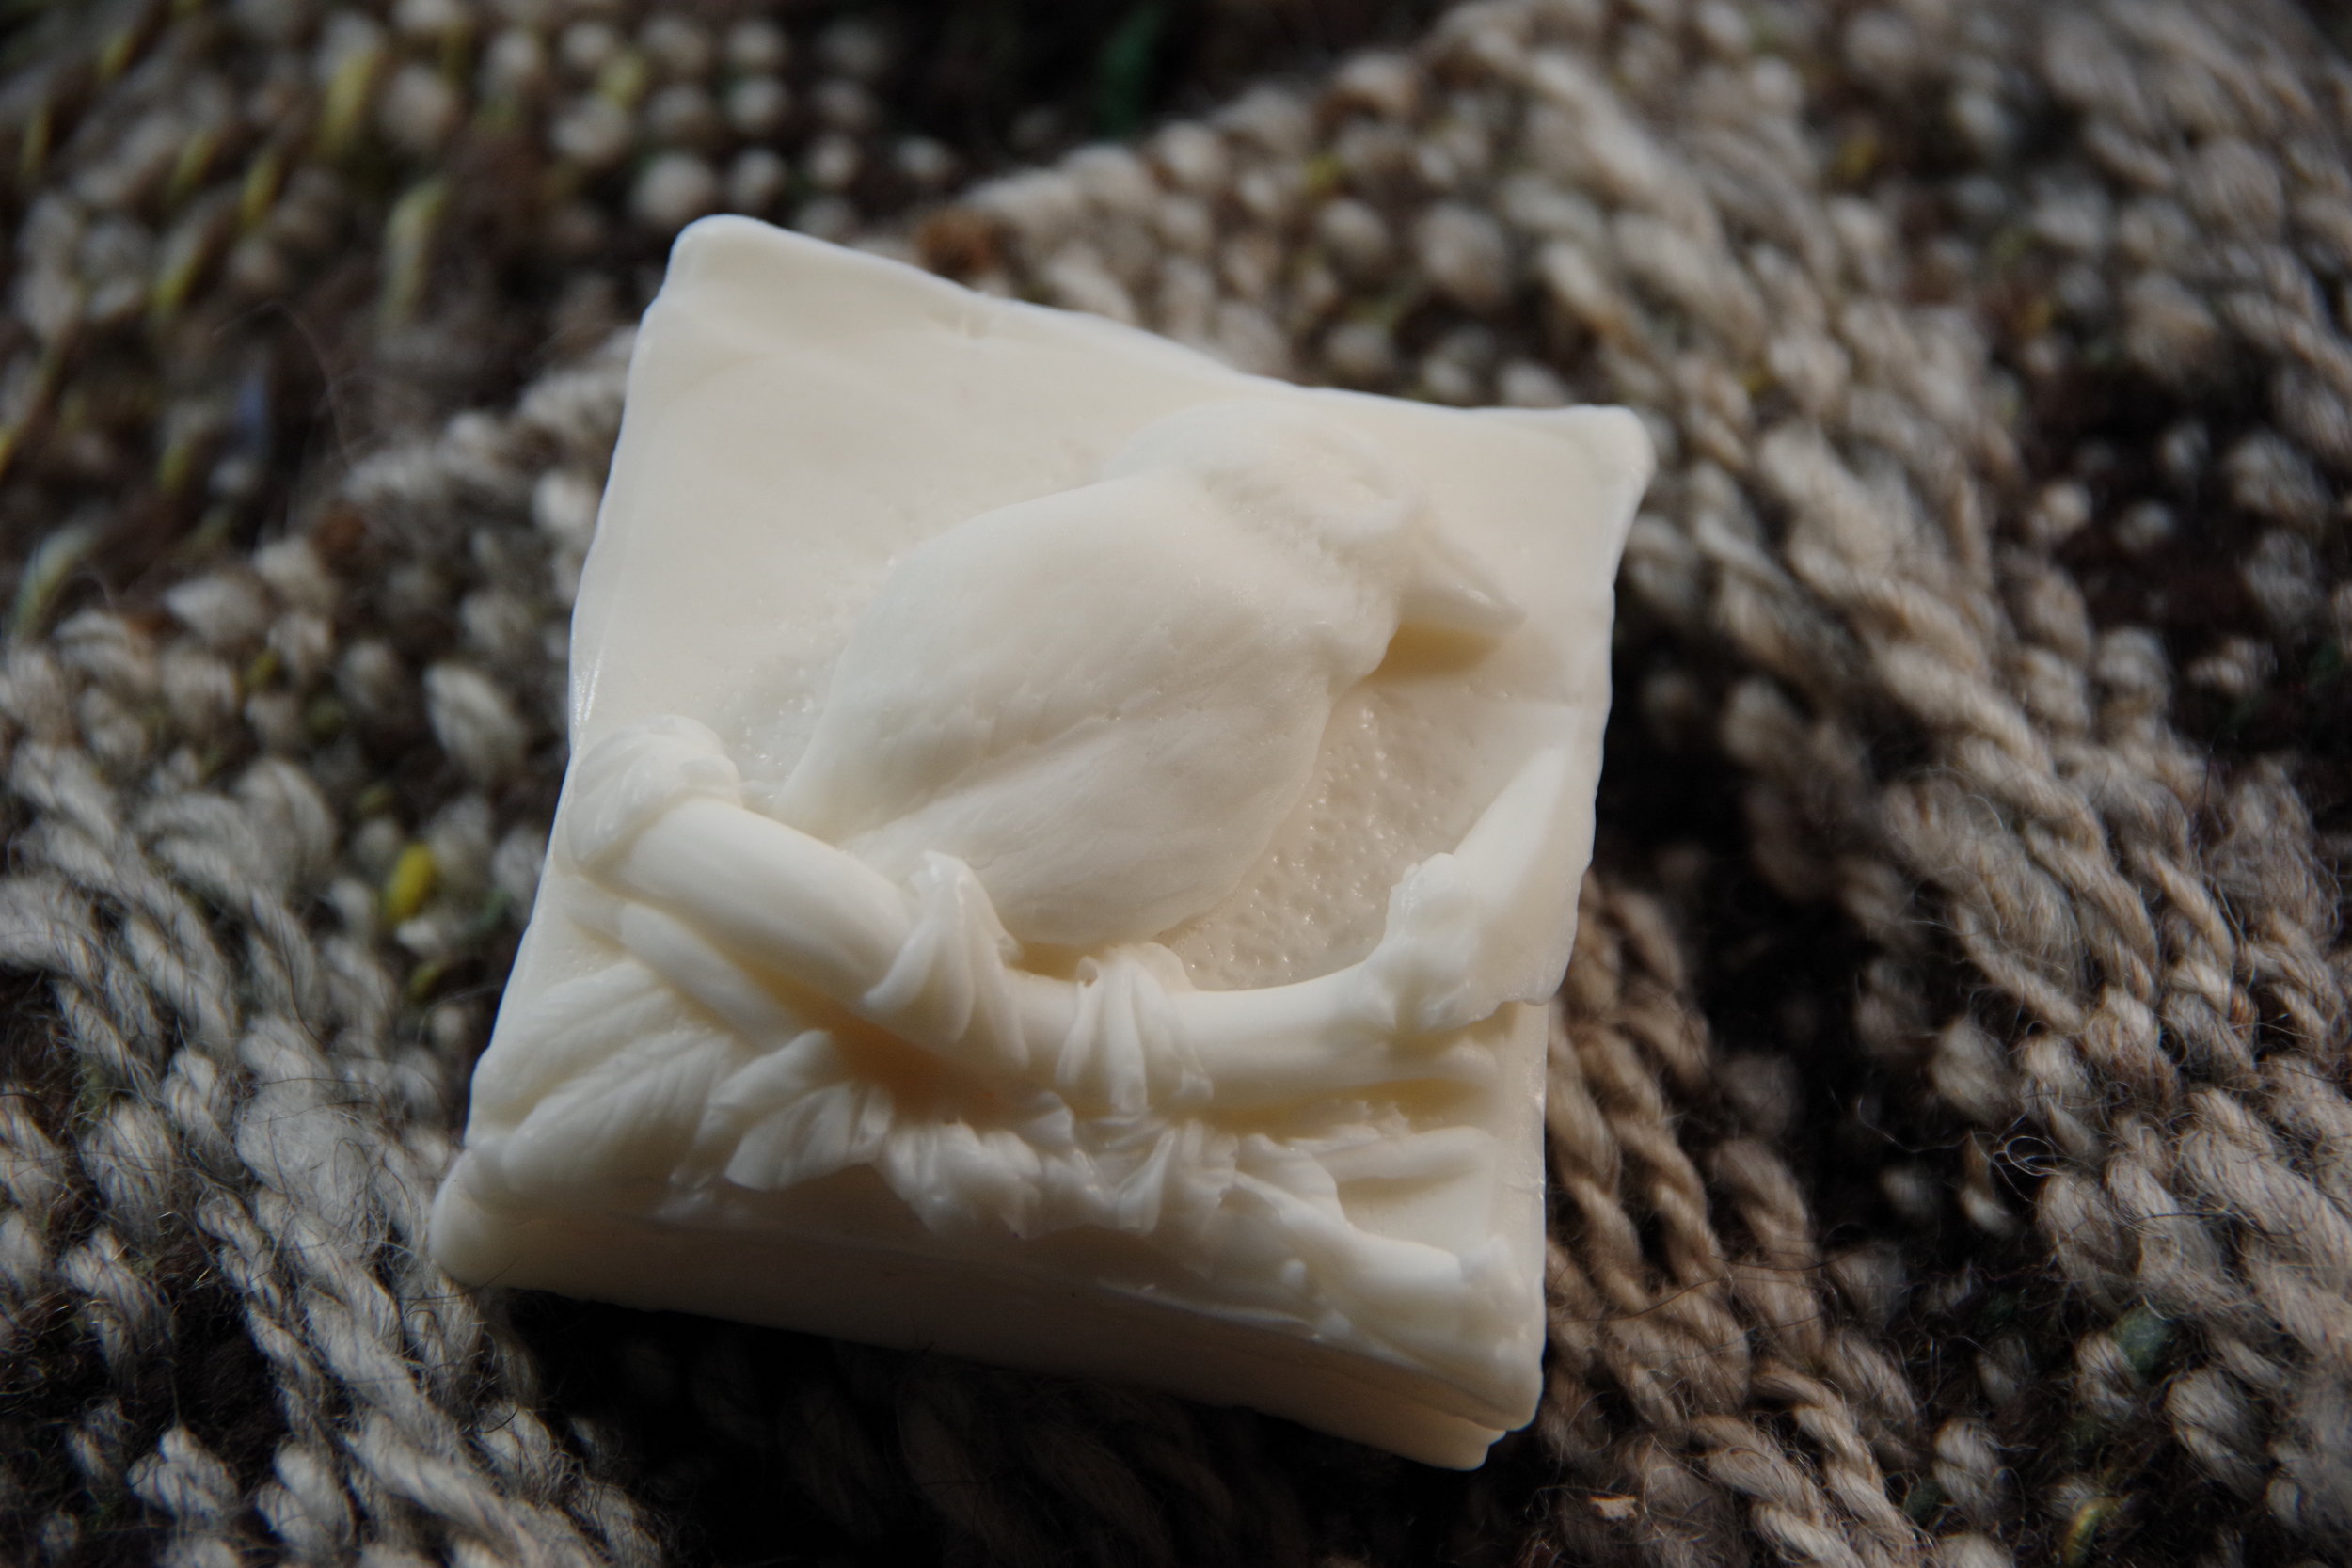
As it turns out, I messed up so badly that it looks good! Hah! What a happy accident. I laughed out loud when I de-molded the soap pour from last night. The mold was sooooo much worse than I had thought — but only on the base — that you probably would have assumed that it was an artistic choice. In fact, the only reason why I’m mentioning it in this tutorial is to remind you that sometimes accidents can, indeed, be happy ones.

Voila!
So bad that it’s good!
Now, of course, it only works because the foreground portion of the mold is fine. If that had warped, I would just call the whole thing a loss. Now I call it an inspiration. Mind you, I still cringe at the bird’s feet, but I’ll get better at them eventually.
So, if you would like to make your own birdie soap, I’ll walk you through the sculpting portion of it. To make the mold and pour your soap, I’ll leave you to your own devices. I mean, really…
Preparation and Materials
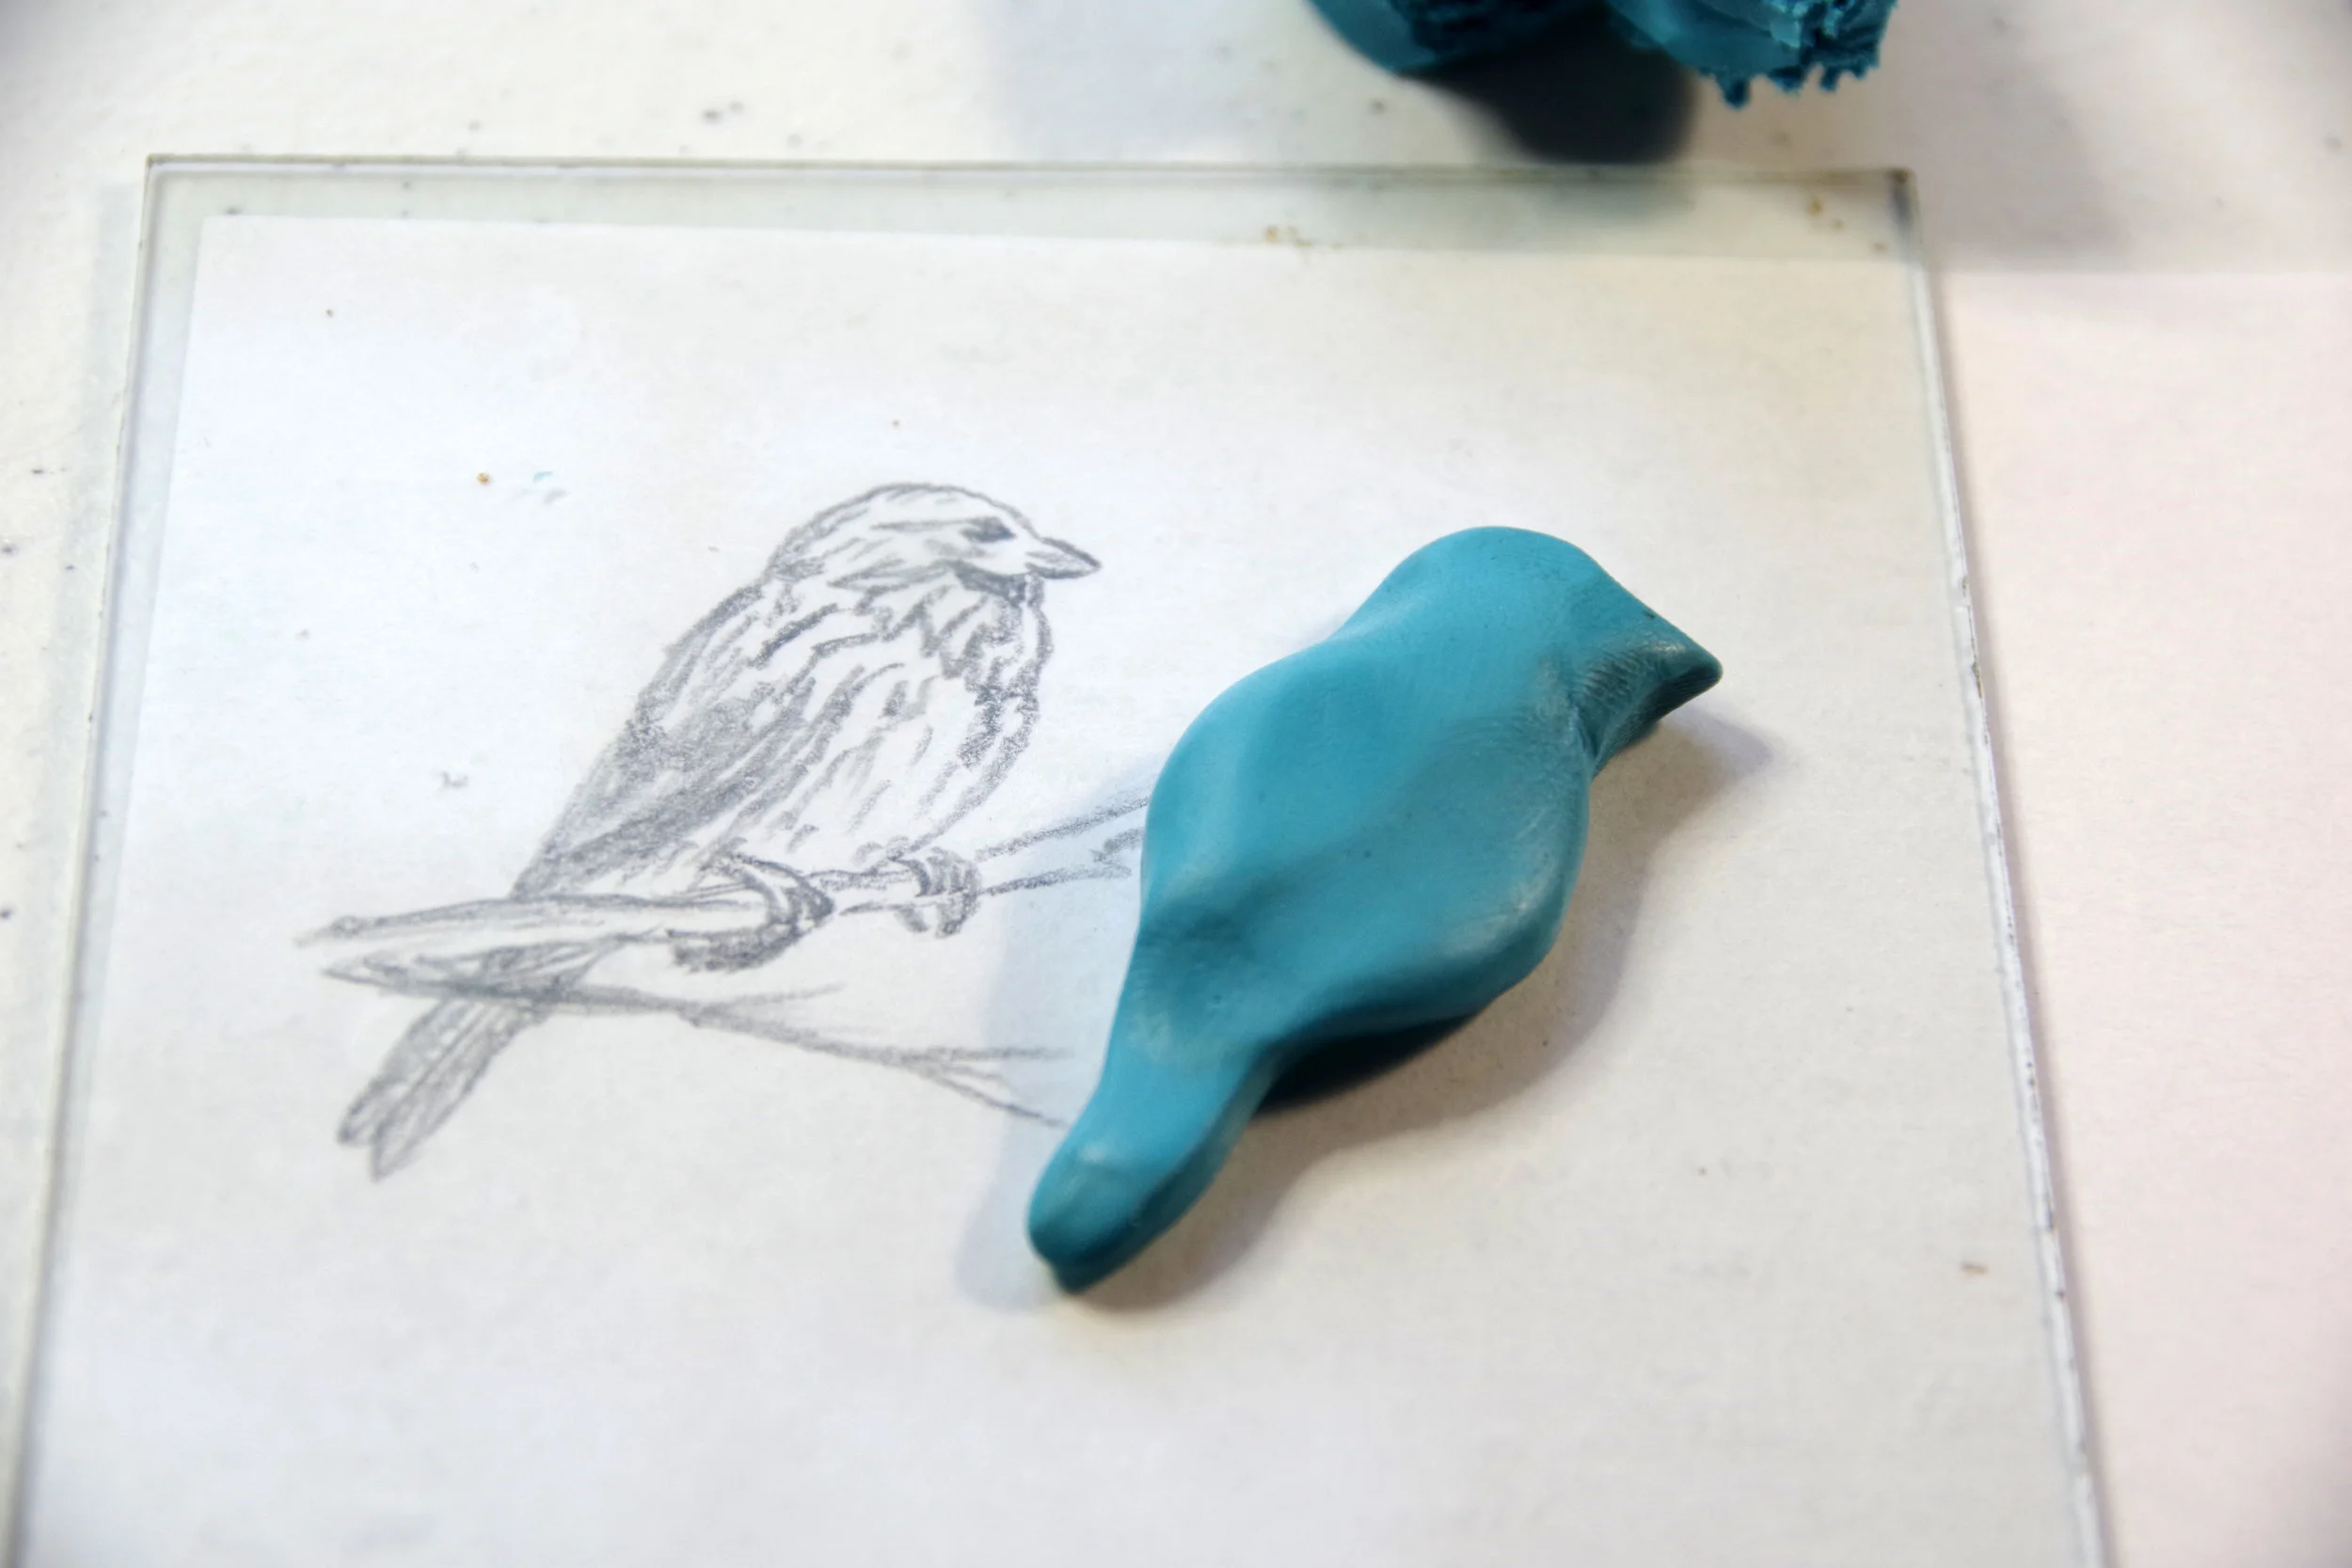
For this sculpt, I used a sketch that I made from a recent photograph, sized to just fit onto the tile that I had selected. Whatever tile or blank you choose to use for your soap mold, check the size of your reference photo/drawing against it before you begin sculpting. Feel free to use any of the photographs that I have posted on this site for reference for your sculpting. (If you do use any of my pictures for sculpting ref, I’d love to see the finished products!)


For this sculpt, I used conditioned polymer clay (color unimportant), tiles, non-porous work surfaces, basic sculpting tools, a 5x7 piece of glass, a reference picture, and a tissue blade.
Portion I — The Bird
Start with enough clay to form the bird
On a piece of glass, form the rough shape of the bird, ignoring the legs and feet
Using your reference picture under the glass as a guide, work the main features of the bird and refine the outline with your hands
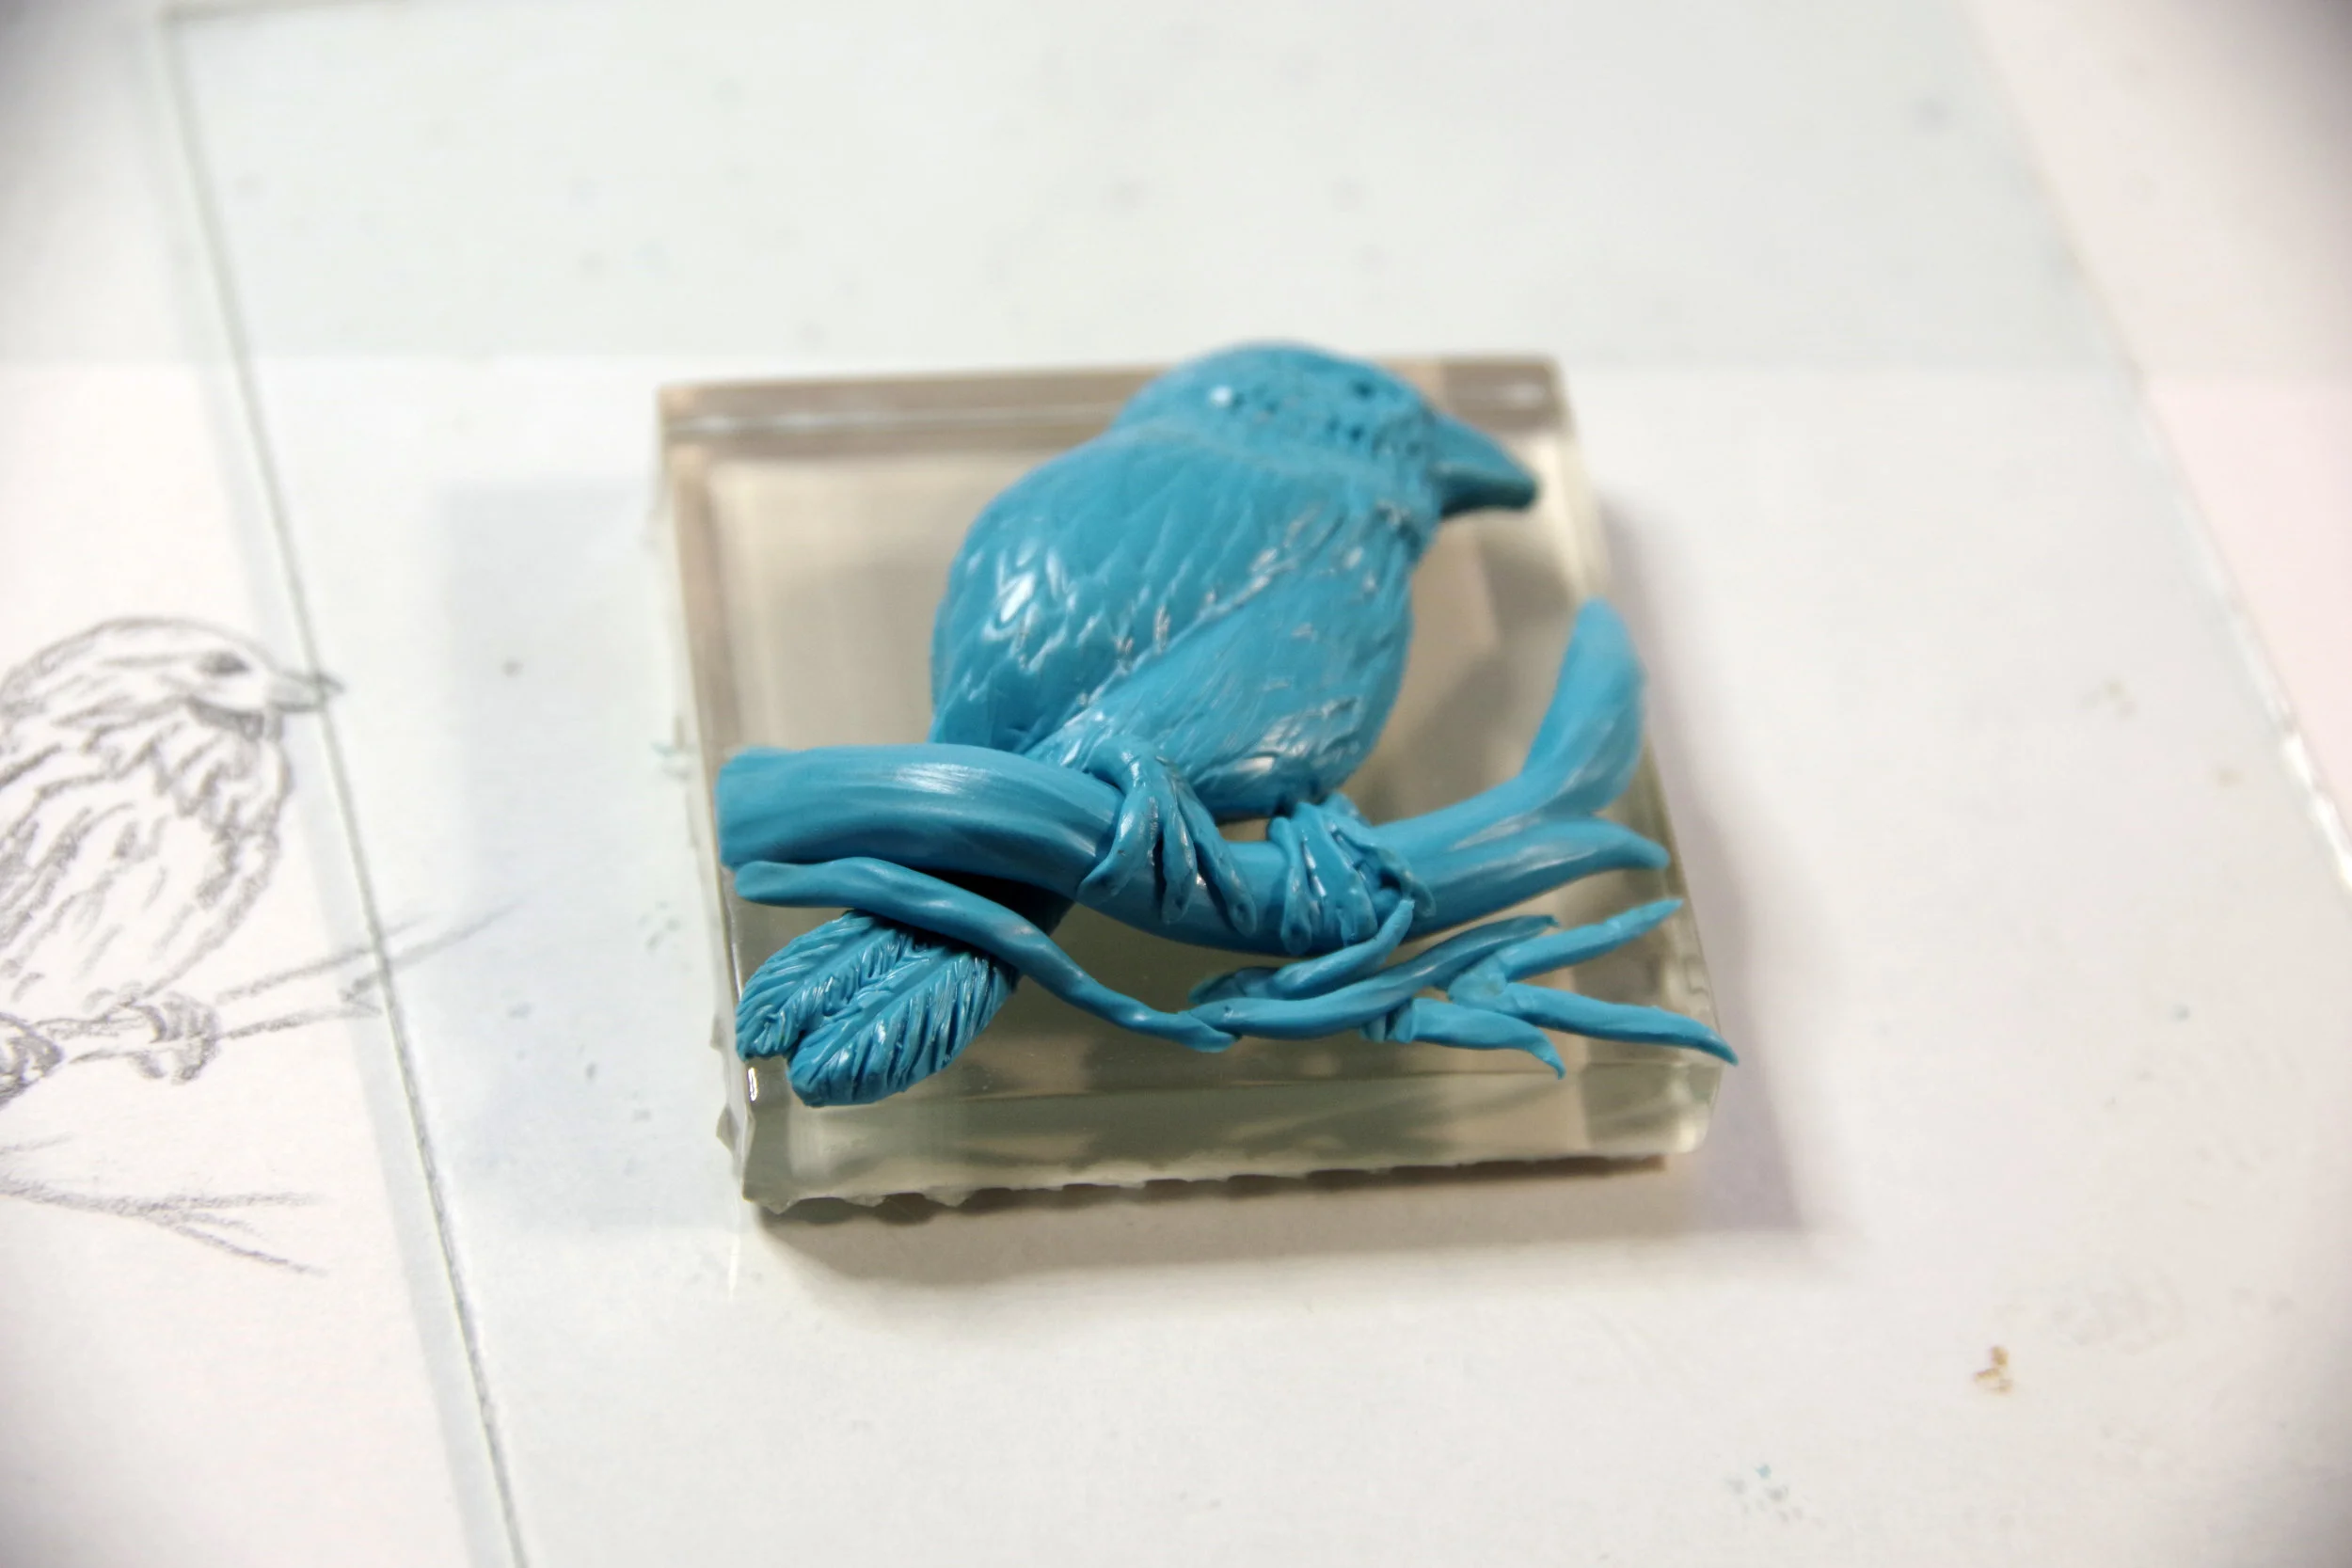
With a needle tool and small silicone shaper, define the details of the eye, beak, wing edges, and tail
With flat sculpting tools, add small feather detail to the head, working from the eye and beak and radiating toward the neck and body
Using longer strokes, add larger feather detail on the body and tail
Working from the bottom and edges of the wing, create feather texture that works up and into the center of the wing
Touch up eye and edges; compare to reference and make any necessary changes
Using a tissue blade, carefully lift bird from the work surface and transfer it to your tile


Portion II — Main Branch and Feet
Make a rope of clay that is longer than the tile is wide (it will curve and get trimmed to fit)
Texture the clay lengthwise to create an impression of bare wood or smooth bark (here you may add nicks, splits, or other points of interest for the branch)
Position the branch roughly where you want it in order to have the bird sitting on it, leaving a small gap for legs
Trim the ends of the branch at an angle so that the ends are flat against the tile
Using a texturing tool or soft blender, secure the branch to the tile and add more texture to it
With additional clay, create two rough shapes for the legs and feet (it’s ok if the’re long; you will trim them later)
Create horizontal texture along the legs and rough out four talons each
Using a tissue blade, remove one leg at a time; pinch and shape talons
Cut legs to size and position them on the bird and branch
Finalize details of the feet


Portion III — Twigs and Leaves
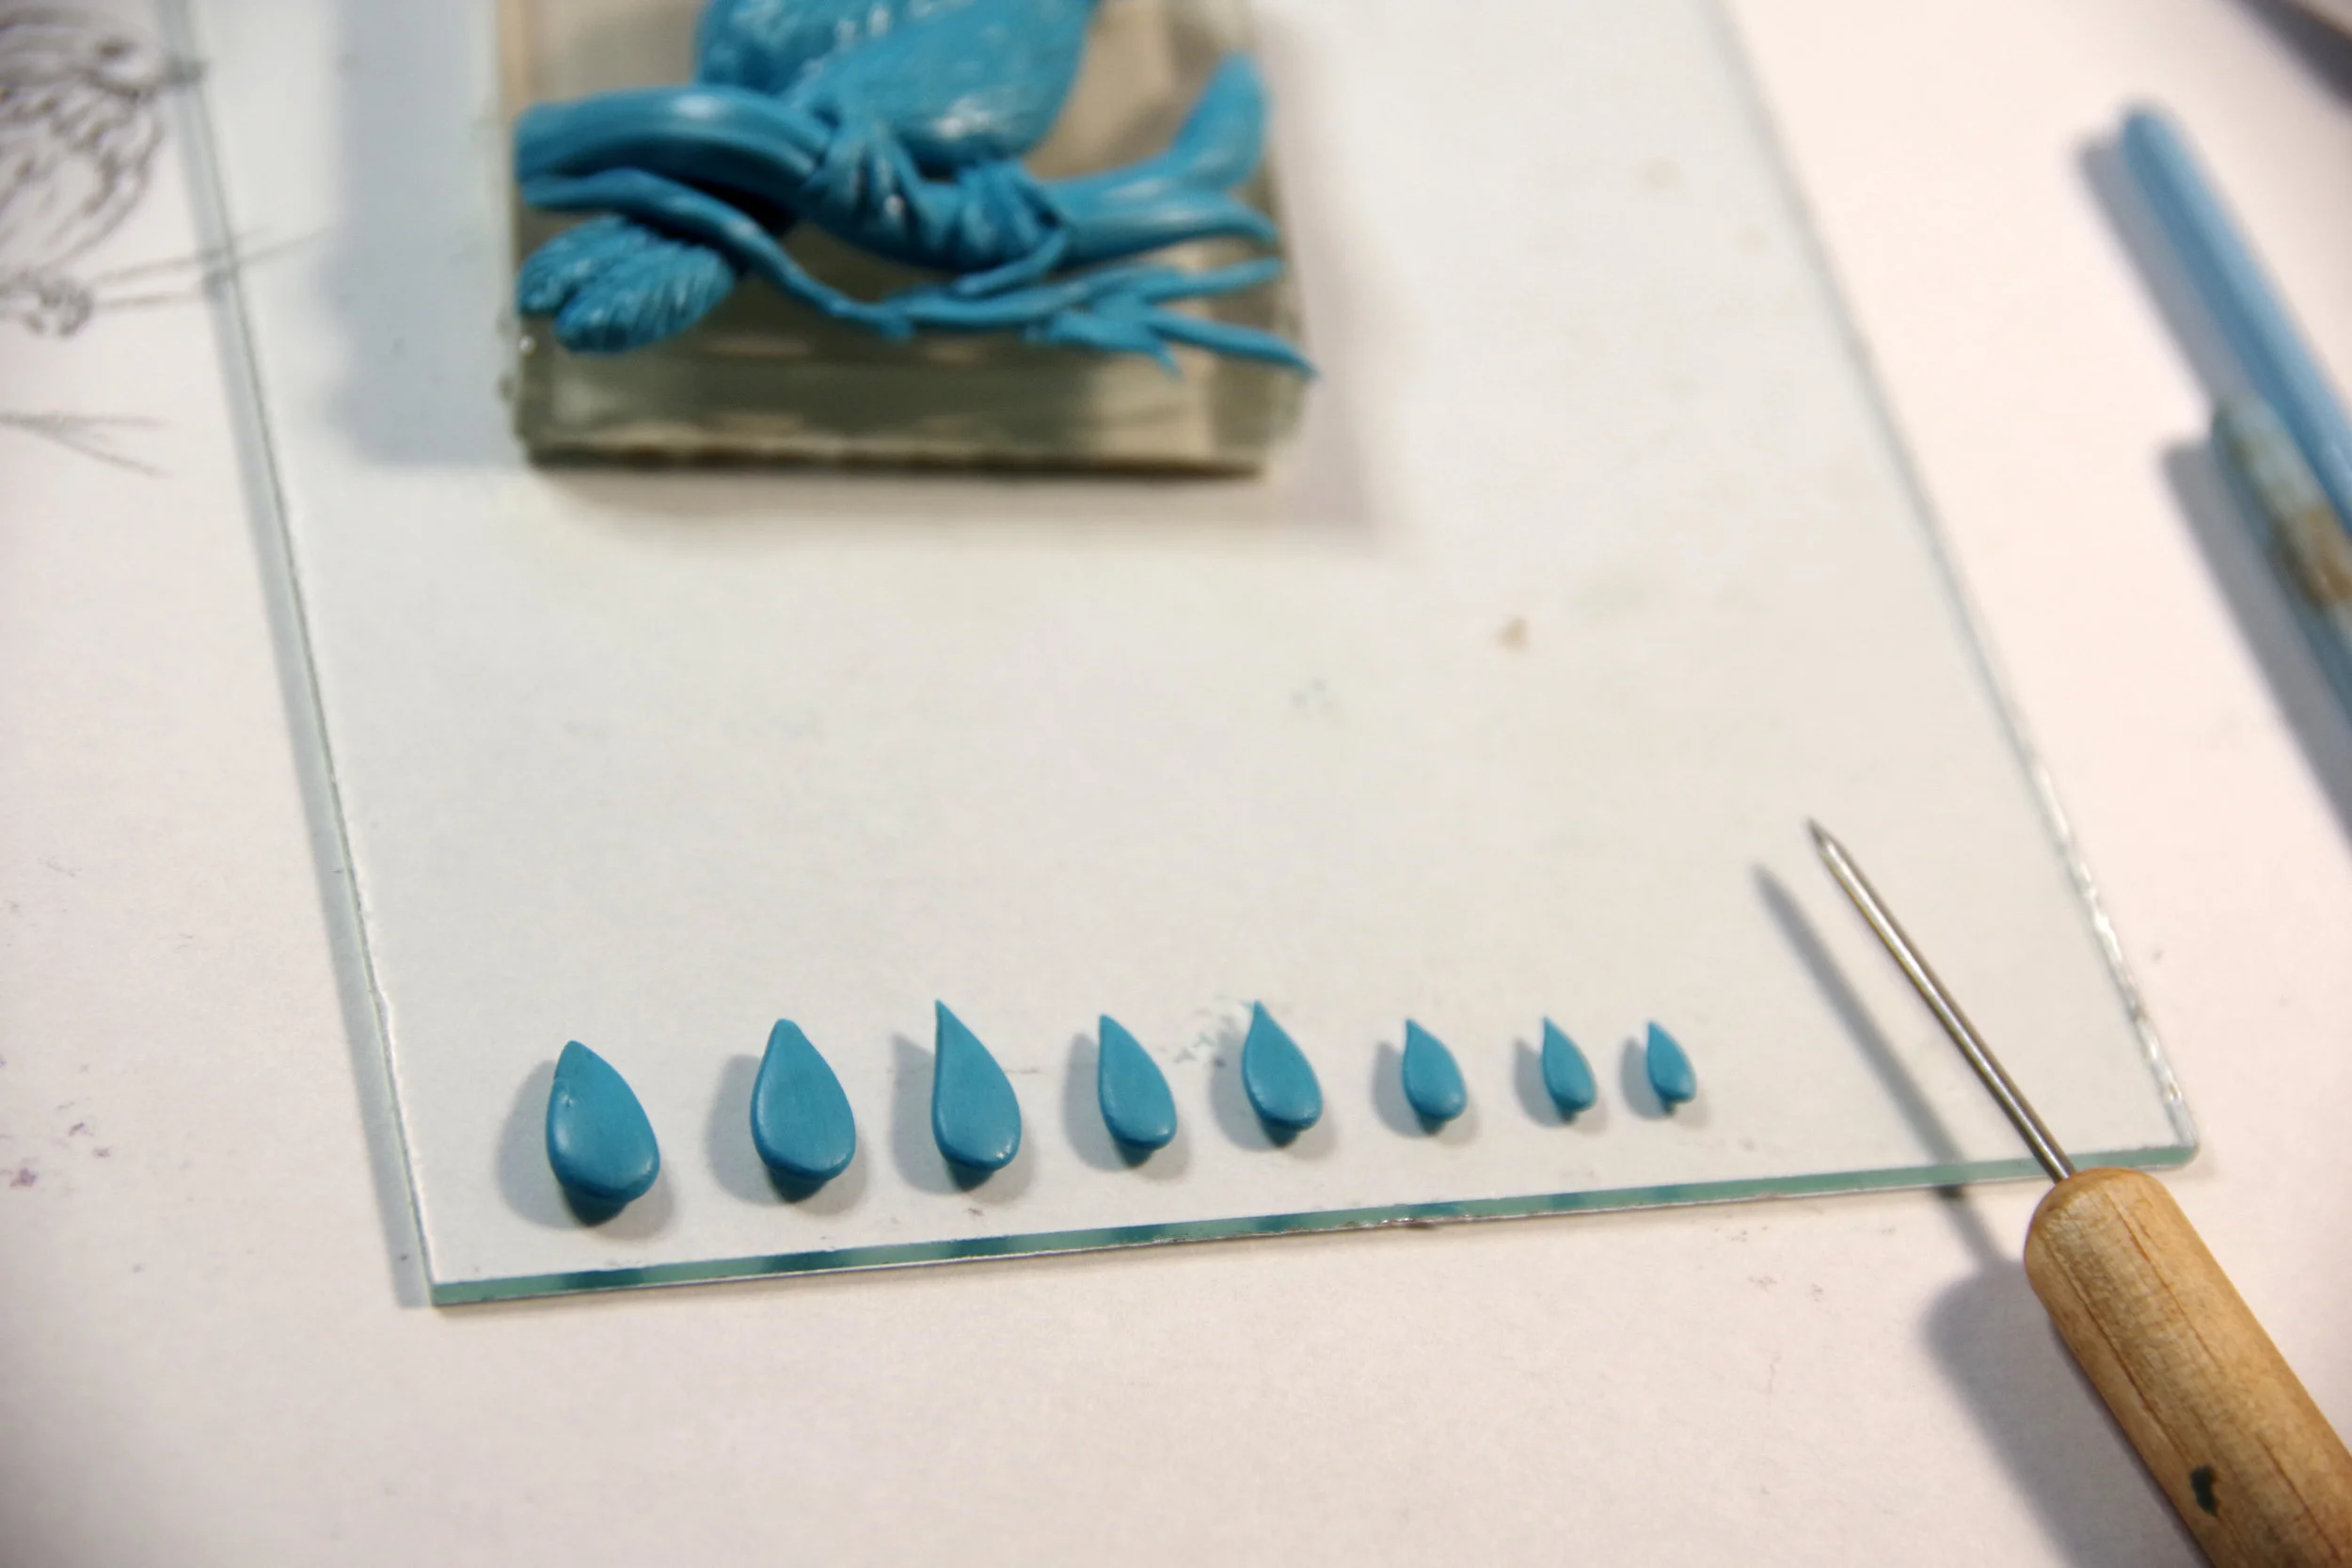
Make several short, thin segments of clay that taper to a point
Starting with the smallest ones farthest away, arrange them all a little offset from one another, the wider ends facing toward where the trunk of the tree would be (they do no need to overlap neatly)
Connect the largest twig to the main branch at the edge of the tile
Ensure that all of the twigs are secured to the tile and add texture as desired
Roll several tiny balls of clay for leaves
Shape each ball into a teardrop shape and flatten onto your work surface
Smooth out fingerprints and, with a needle tool, add leaf details (see previous tutorials)
With a tissue blade, lift leaves from the work surface
Shape them in your hands, then use a needle tool to place the leaves over the twigs
Continue placing leaves until all of the gaps in the twigs are covered, then place a couple on the main branch


This is the part where I tell you to bake according to the manufacturer’s instructions — and I will — but sculpting for a mold has a couple of challenges to keep in mind. First, if you end up making a good mold, it can pick up tiny issues that you may have overlooked, and those will be repeated with every casting. It’s a good idea to double-check everything for fingerprints and errors. Some folks might like to soften rough edges at this stage. Second, delicate little parts that stick out are likely to break. You might want to flatten out or reinforce anything that looks like it would break in a mold. Finally, in a soap-specific context, deep relief will help to hold the shape a little longer. If you’ve made all of your details very shallow, you might want to think about how the soap will look after a few uses and deepen some of the more important lines.
Now you are ready to bake your piece according to the manufacturer’s instructions.

Guess what friends and family are getting for Christmas…