A preface and dedication
My son had a delightful sense of humor. He had a way of wrapping big thoughts up in just a few, pithy words. As someone who struggles with witty brevity, I admired that skill of his. When, a few years ago, he heard about an archaeological find of ancient butter that had apparently been deposited in a bog as an offering, he nearly doubled over laughing. He pulled himself together long enough to tell me that it was funny because he imagined that I would have done that if I’d been there... and then he erupted again. Before he’d finished laughing, he had already changed my name in his phone to “Butter Druid” and had to show it to me because he was still laughing too hard to speak. I can still see him there, in my mind’s eye, sitting on the floor and laughing about how I’d absolutely reserve my finest butter for the bog gods.
You might wonder why that was so funny. The religious rites of our distant ancestors weren’t normally something that he’d laugh at. He loved hearing the old stories and studying mythology and iconography. I promise that he wasn’t mocking anyone — past or present, mortal or divine — but was only laughing in pure mirth at having discovered what he felt was the perfect way to encapsulate his weird and wonderful mother. A frickin’ butter druid. That’s me.
He really was my biggest fan, and his encouragement kept me going through most of these projects on this blog. Going forward without him here, I often find myself wondering what he’d think of this or that piece. Sometimes, I’m just lost. Sometimes his memory or spirit inspires me to something new. In a future post, I’ll share with you some of the pieces that he has inspired since his death, but this one… This one is absolutely dedicated to my wonderful goofball of a son who summed me up as a bog-loving swamp witch who’d find a giant lump of butter to be a meaningful sacrifice to the land spirits. I’m really very honored. So… This one’s for you, Rae. Laugh it up!
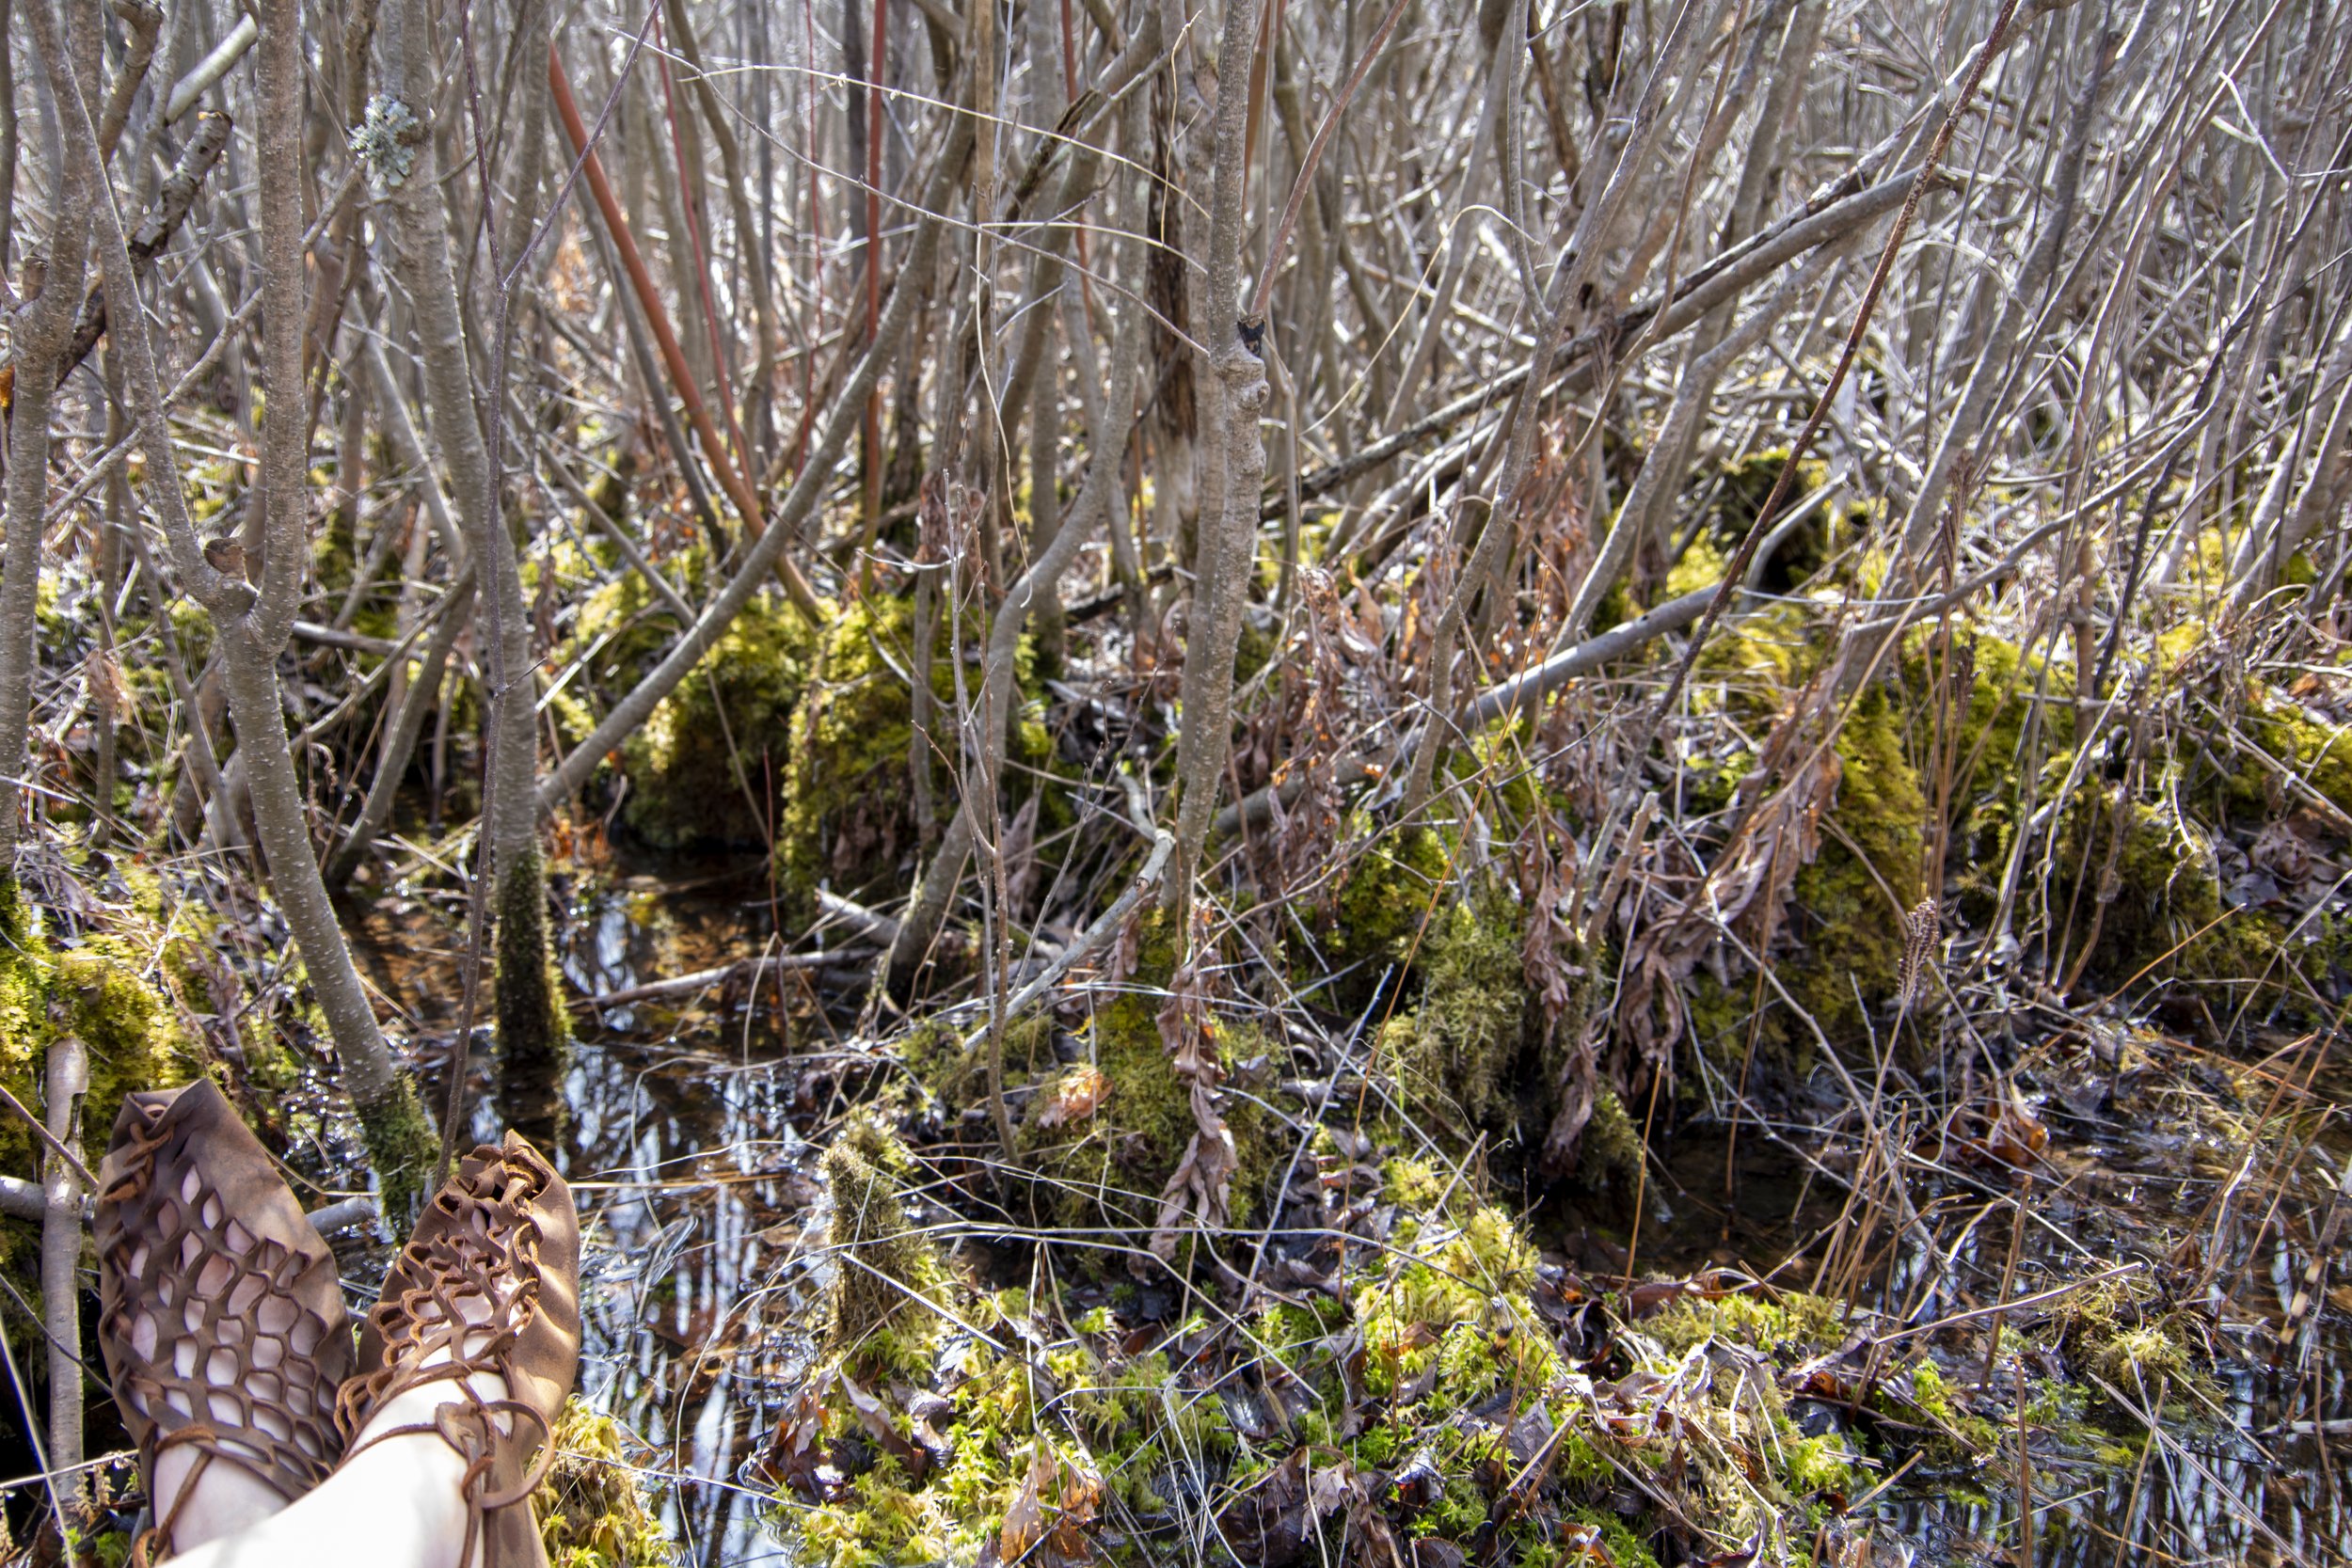
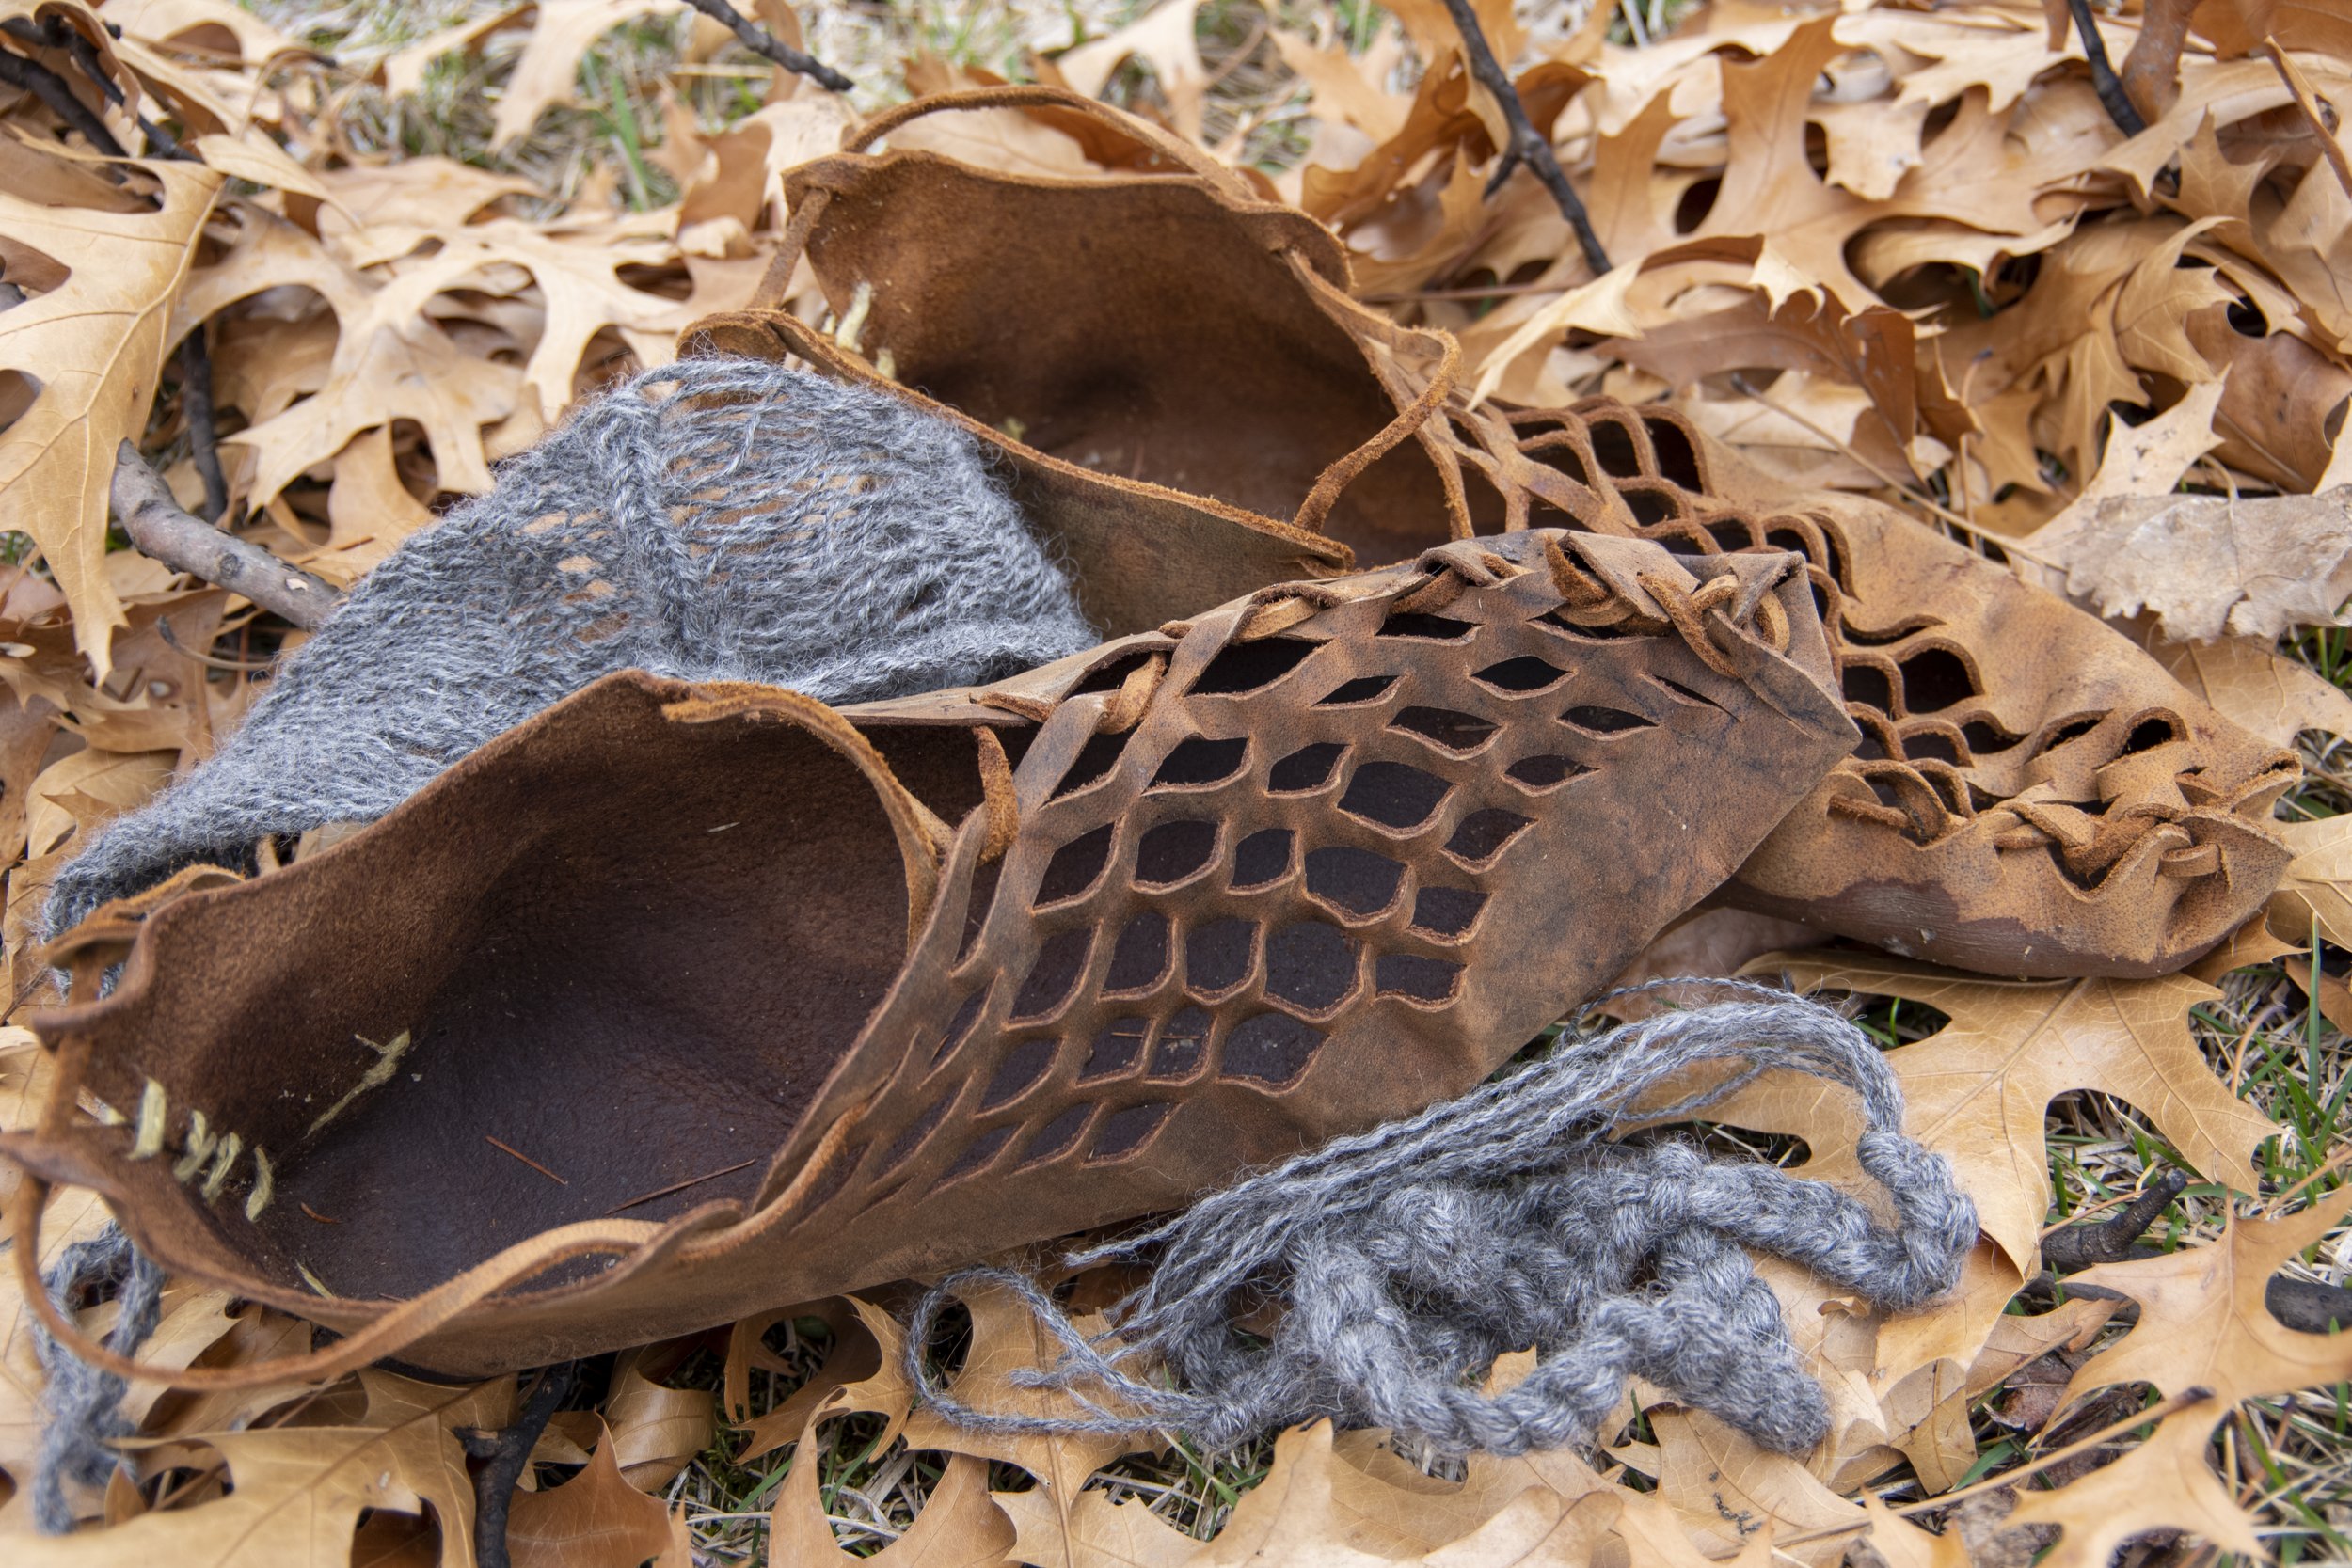
Damendorf shoes in their natural habitat
Damendorf Shoes
Any quick search for Damendorf Man will bring up images of these shoes. Even if the name doesn’t ring a bell, if you’ve looked at bog bodies and their artifacts, you’ve probably seen these shoes before. I saw pictures of them when I was younger and imagined that they must have been terribly difficult to make. I’ve wanted a pair my whole adult life, but I thought that it would take a lot of skill to craft them. Recently, though, I found a drawing floating around the internet, and it suddenly felt achievable. If you, too, have toyed with the idea but thought that you would just make a mess of it, I’d encourage you to get your hands on some inexpensive leather and just give it a try. Prior to this, I’d had limited experience with leather working. I made some very simple costume pieces for my children about 15 years ago. I’d call this project suitable for an adventurous beginner.
Now, I’m not entirely sure who created the drawing that I’m going to reference. To be on the safe side, I’m just going to say again that it’s very easy to find with a simple search for Damendorf Man shoes. I would encourage you to do so. Myself, I did not try to print it out to size or project it or even copy it with a grid. I just eyeballed the proportions and tried to replicate that with my own foot in the center. I left enough space at the toe and heel that (with the heel closed behind my foot) I’d be able to wrap to just over the tops of my toes before the lacings and slits began. Bear in mind that these shoes will stretch in most directions, but that heel-to-toe sole portion will stretch the least.
Walk-through
Here I confess that I did not take enough process photos to do a proper tutorial. I was making these shoes for photos for our local zine, Moss Piglet, and wasn’t yet back in the tutorial mindset. I’ll try here to reconstruct the process.
MATERIALS
Craft leather about 1/16” thick (for a women’s US size 10 foot, I’d recommend about 14”x10”, but your mileage will vary)
Pencil (preferably soft and dark)
Craft knife (and maybe an extra blade)
Cutting mat
Sturdy thread, twine, or waxed thread
Leatherworking needle
Leather conditioner of your choice and soft cloth
Reference image of your choice
METHOD
Using the readily available (but not my own) pattern online as a guide, I laid out a piece of leather on the floor, wrong side up, and placed my foot where I thought it would best allow for the heel portions to wrap around the back of my foot. With the pencil, I sketched out the general shape. Because I was using leather that was only 12”x12” I realized that I would not be able to include the strap. If your foot is shorter or leather is longer, I do recommend doing it all in one piece. I certainly will do so in the future.
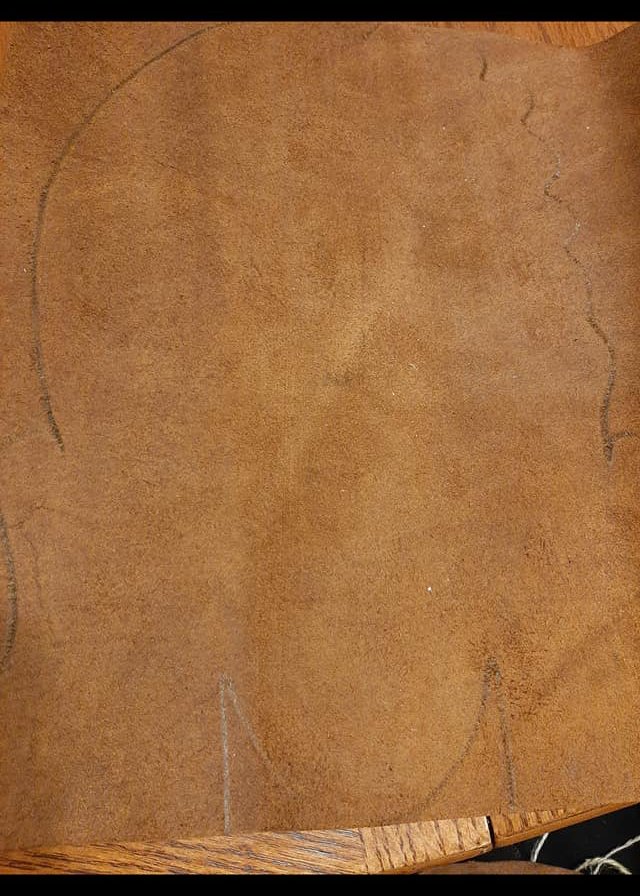
The center heel portion does not need to be this long. I left it this way to begin with, then trimmed it later.
Next, I cut out the shape and added in the staggered rows of slits. I think that I was overly cautious about length and spacing. In the future, I might make them longer and closer together. The key for this pattern is to have them alternate with one another so that they will make the diamond shape when they are stretched. You can go back later and lengthen slits as needed.
I cut small holes along the sides of the back that fold up to form the vertical seam at the heel. I laced these with flax twine and a leather needle. These holes could be made with a blade, needle, awl, or other leatherworking tool. At this time, I only laced loosely, as I would need to unlace it again and lay it flat.
I then tried it on and laced it up with some twine. I did not stretch it fully at this point. I checked for errors and general fit. I made a few adjustments.
Then I cut out the second shoe, using the first one as a pattern — but reversed. (Of course, I unlaced the back first.) If cutting gets harder along the way, check your blade. A sharp blade can make a big difference with this much cutting.


After I was satisfied with the size and shape, I applied a liberal coat of leather honey and gently stretched the leather in my hands. I probably should have done more of this, and I’d recommend it again once the shoe is formed.
At this point, I cut long strips of leather to use as laces — one for each shoe. The lace would be tied at the toe and laced through the holes on once side and top row of slits on the other, so you’ll need to use your own judgement about how long to make it. If you’re going to cut a “buckle” to help hold it in place, this is the time for that, too. I’m not sure that it’s authentic to the period, but it made sense to me and held well when I wore the shoes later.
Now for the heels. I Sewed up the vertical seams in the same manner as I had before when testing the first shoe. For the lower part, I turned it up so that it fit snugly, trimmed to about an extra half inch, cut v shapes out to allow it to curve, and sewed it over the rest of the heel. I’m confident that there are better ways to do this, but it did hold perfectly well. I couldn’t find any photos of the Damendorf shoes from behind, so I had to improvise.

Then it was time to lace them up and try them out! Because I was intending to do a photo shoot with them and didn’t know how well they’d hold up, I didn’t wear them around the house and yard as much as I wanted. It was enough, though, to catch a few remaining spots where the slits weren’t quite right or the fit needed to be adjusted. The nice thing about making something for oneself is that it’s always a custom order.
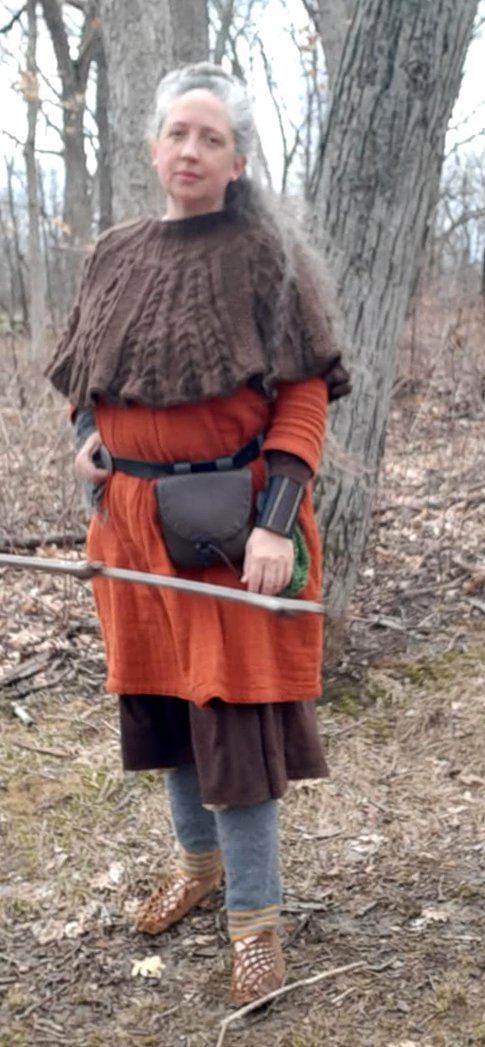
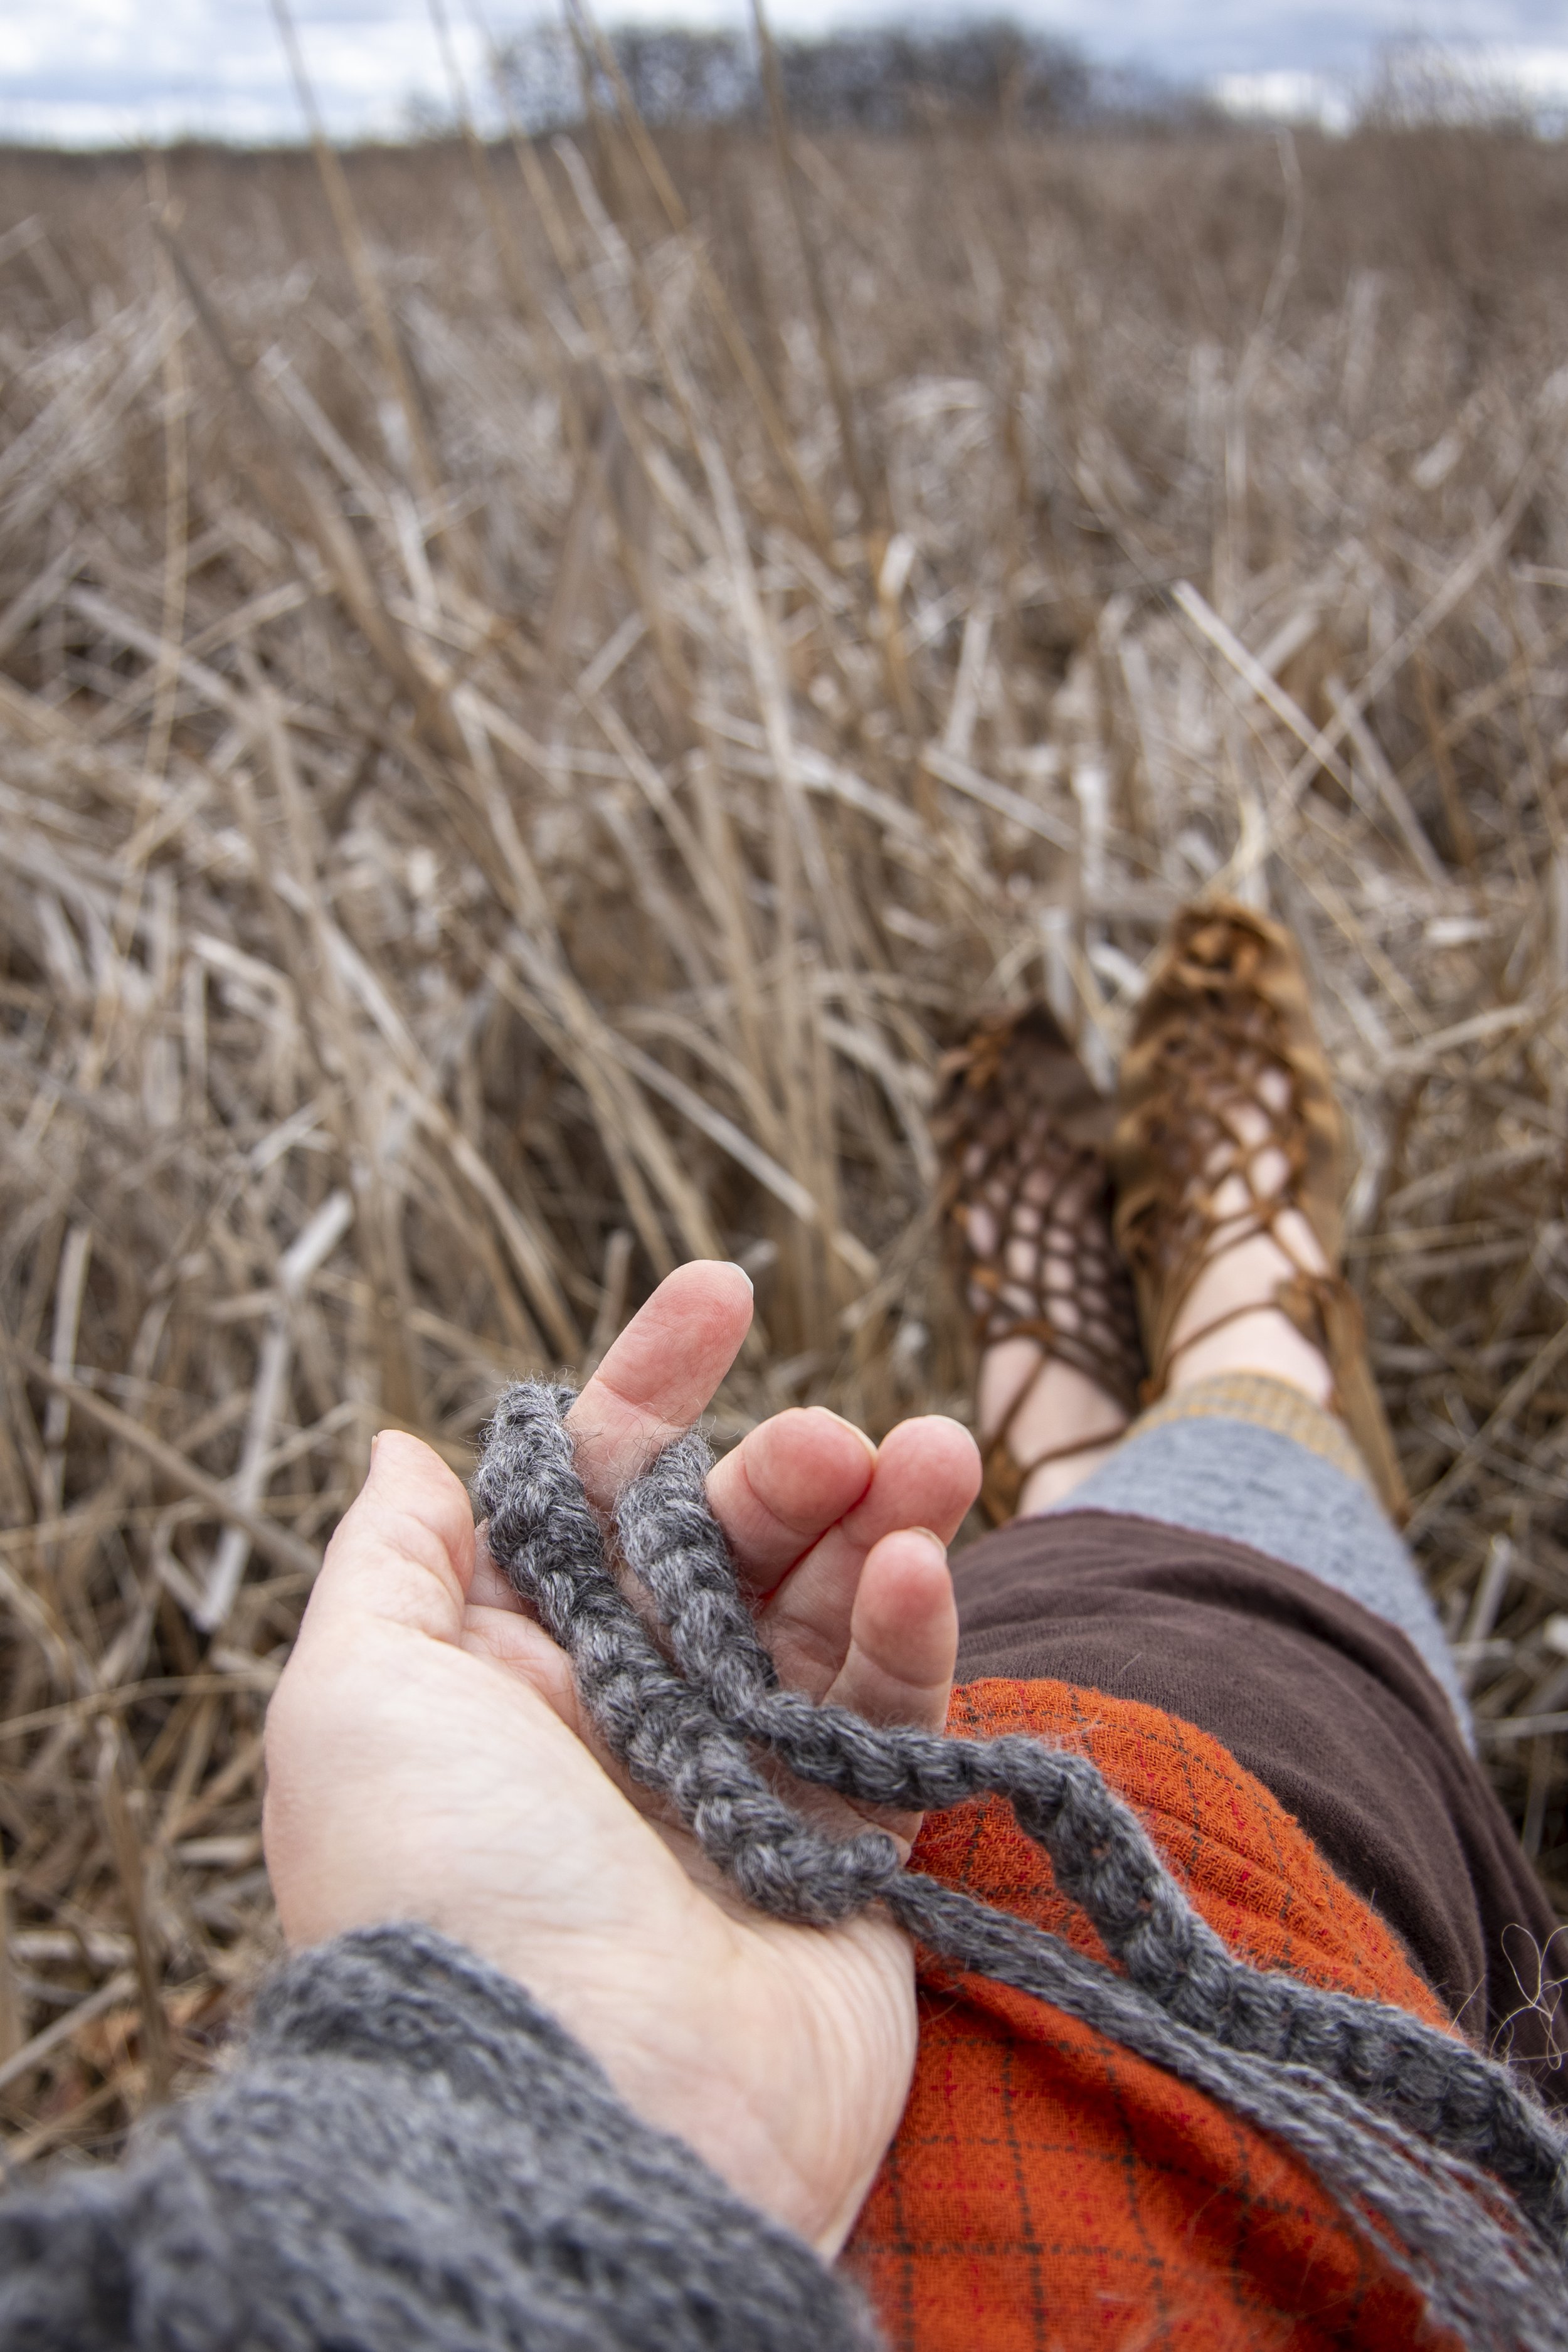
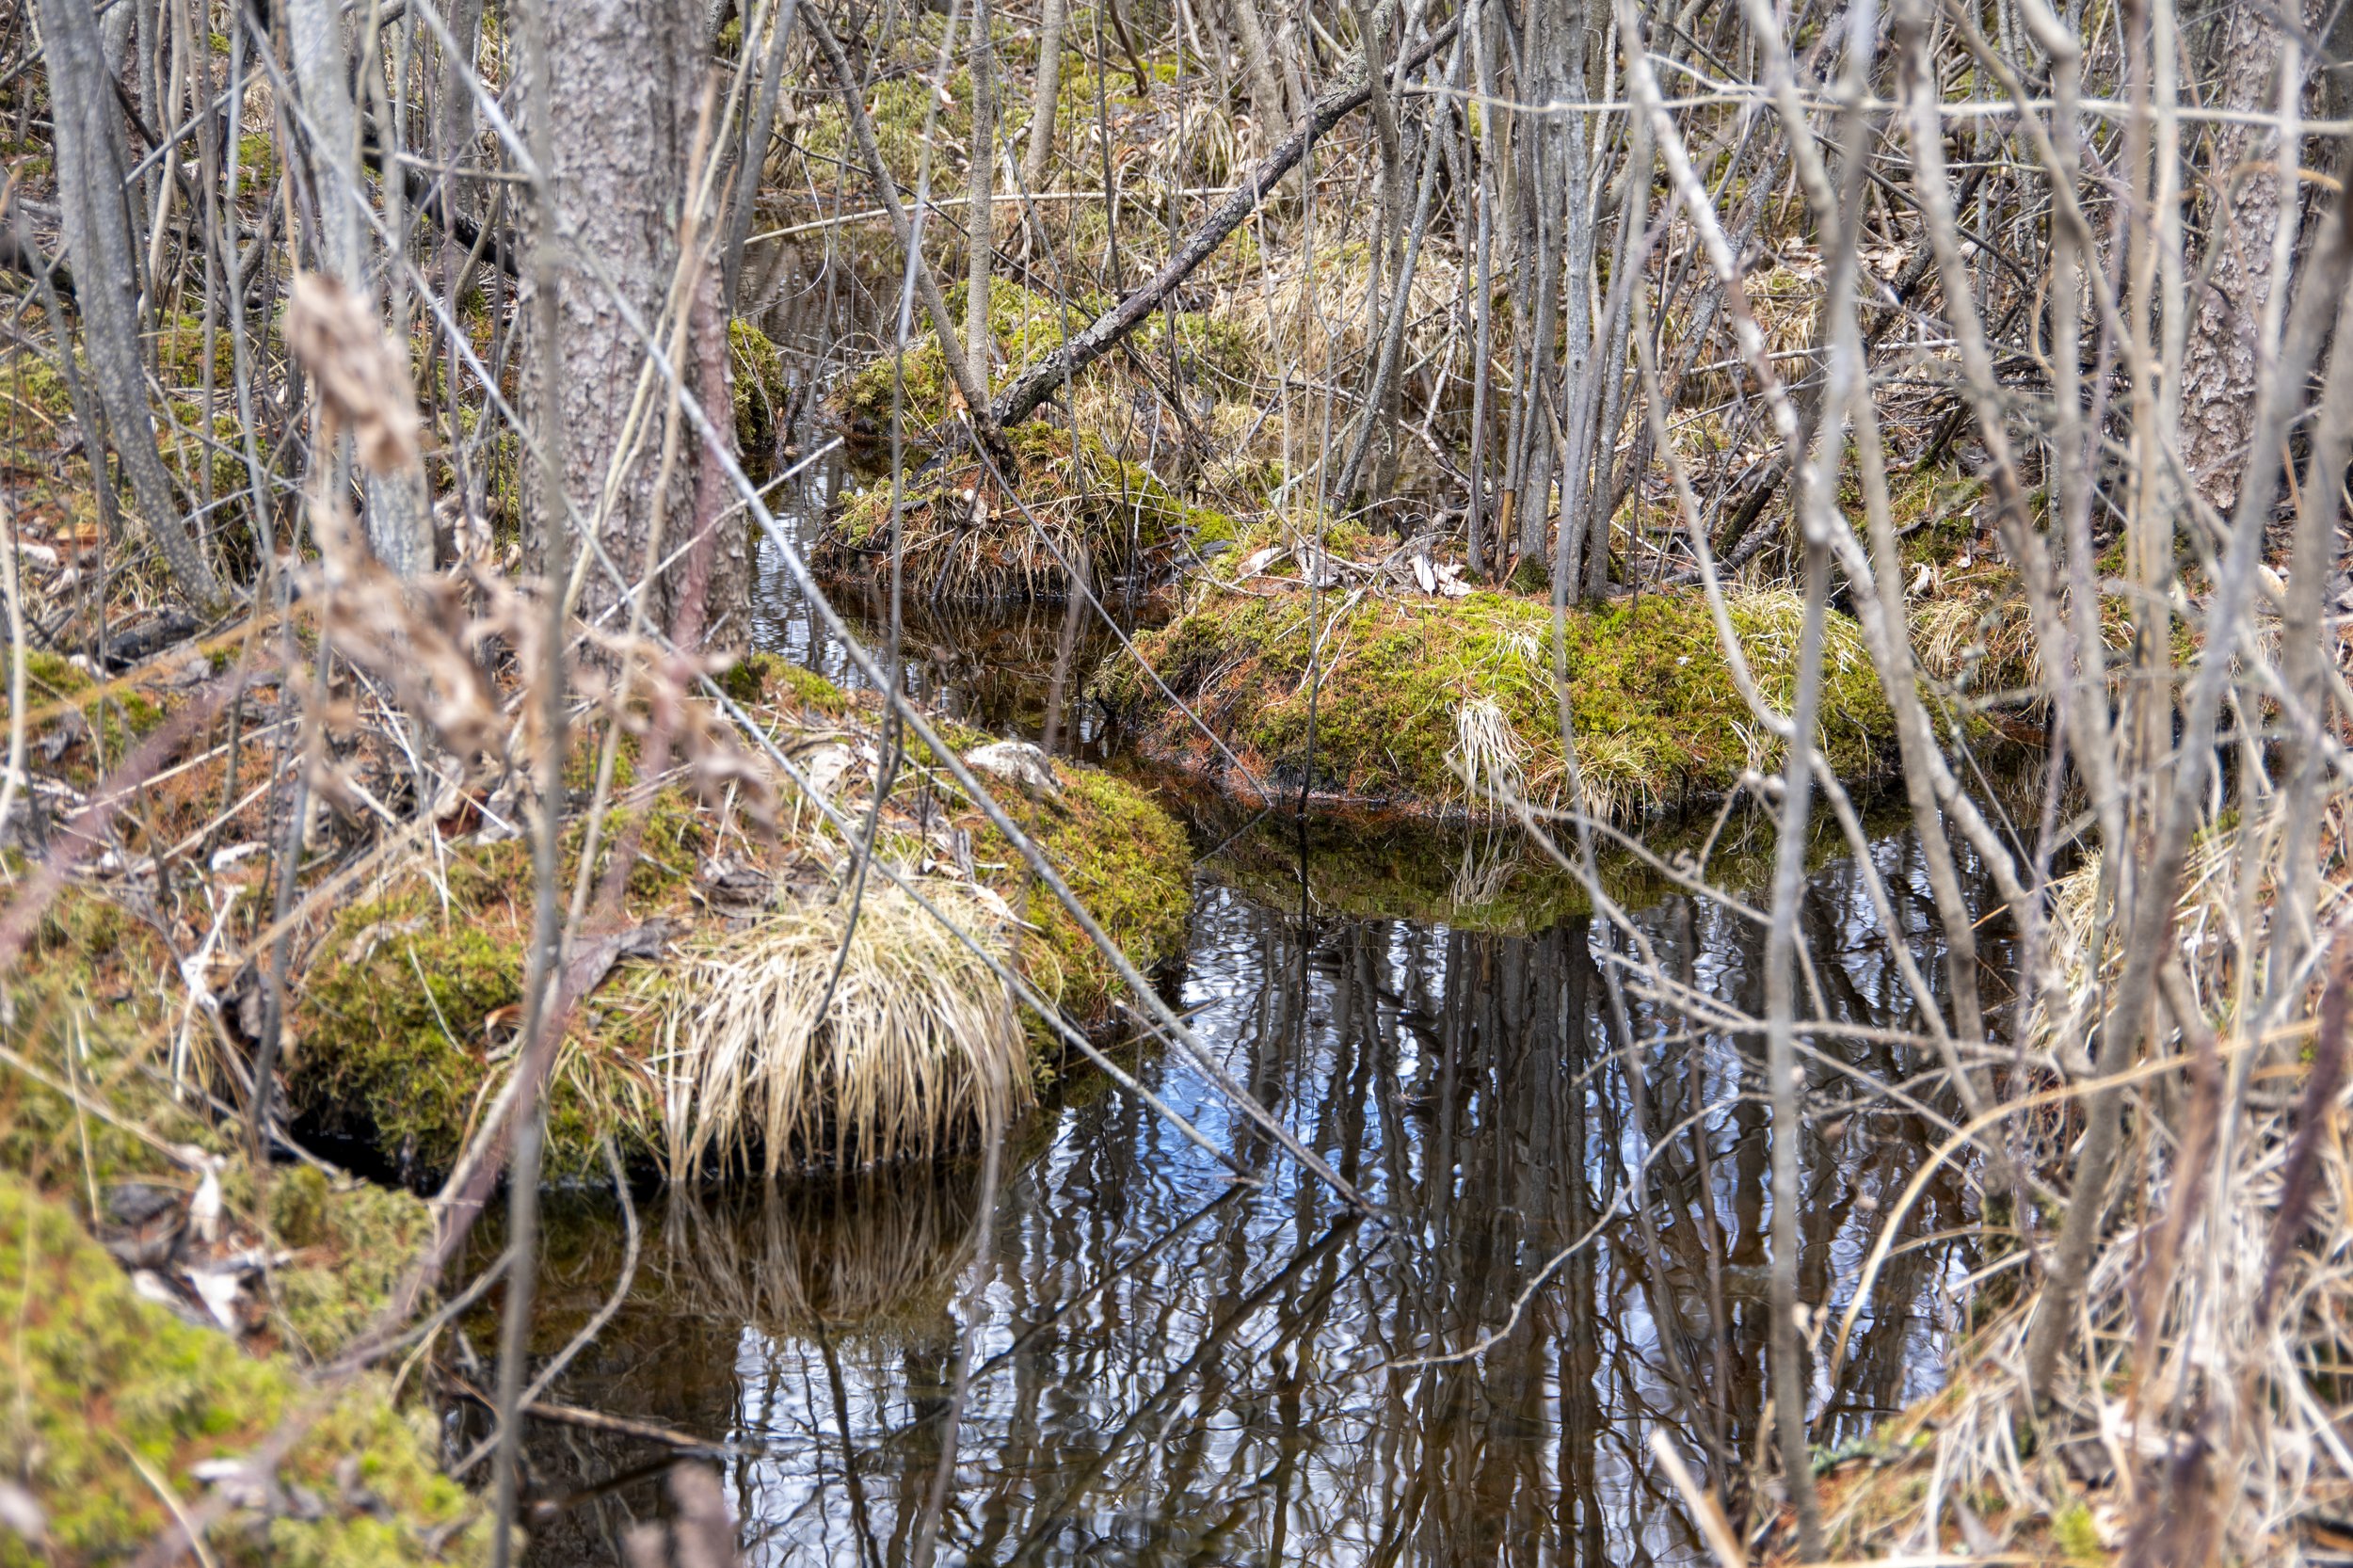
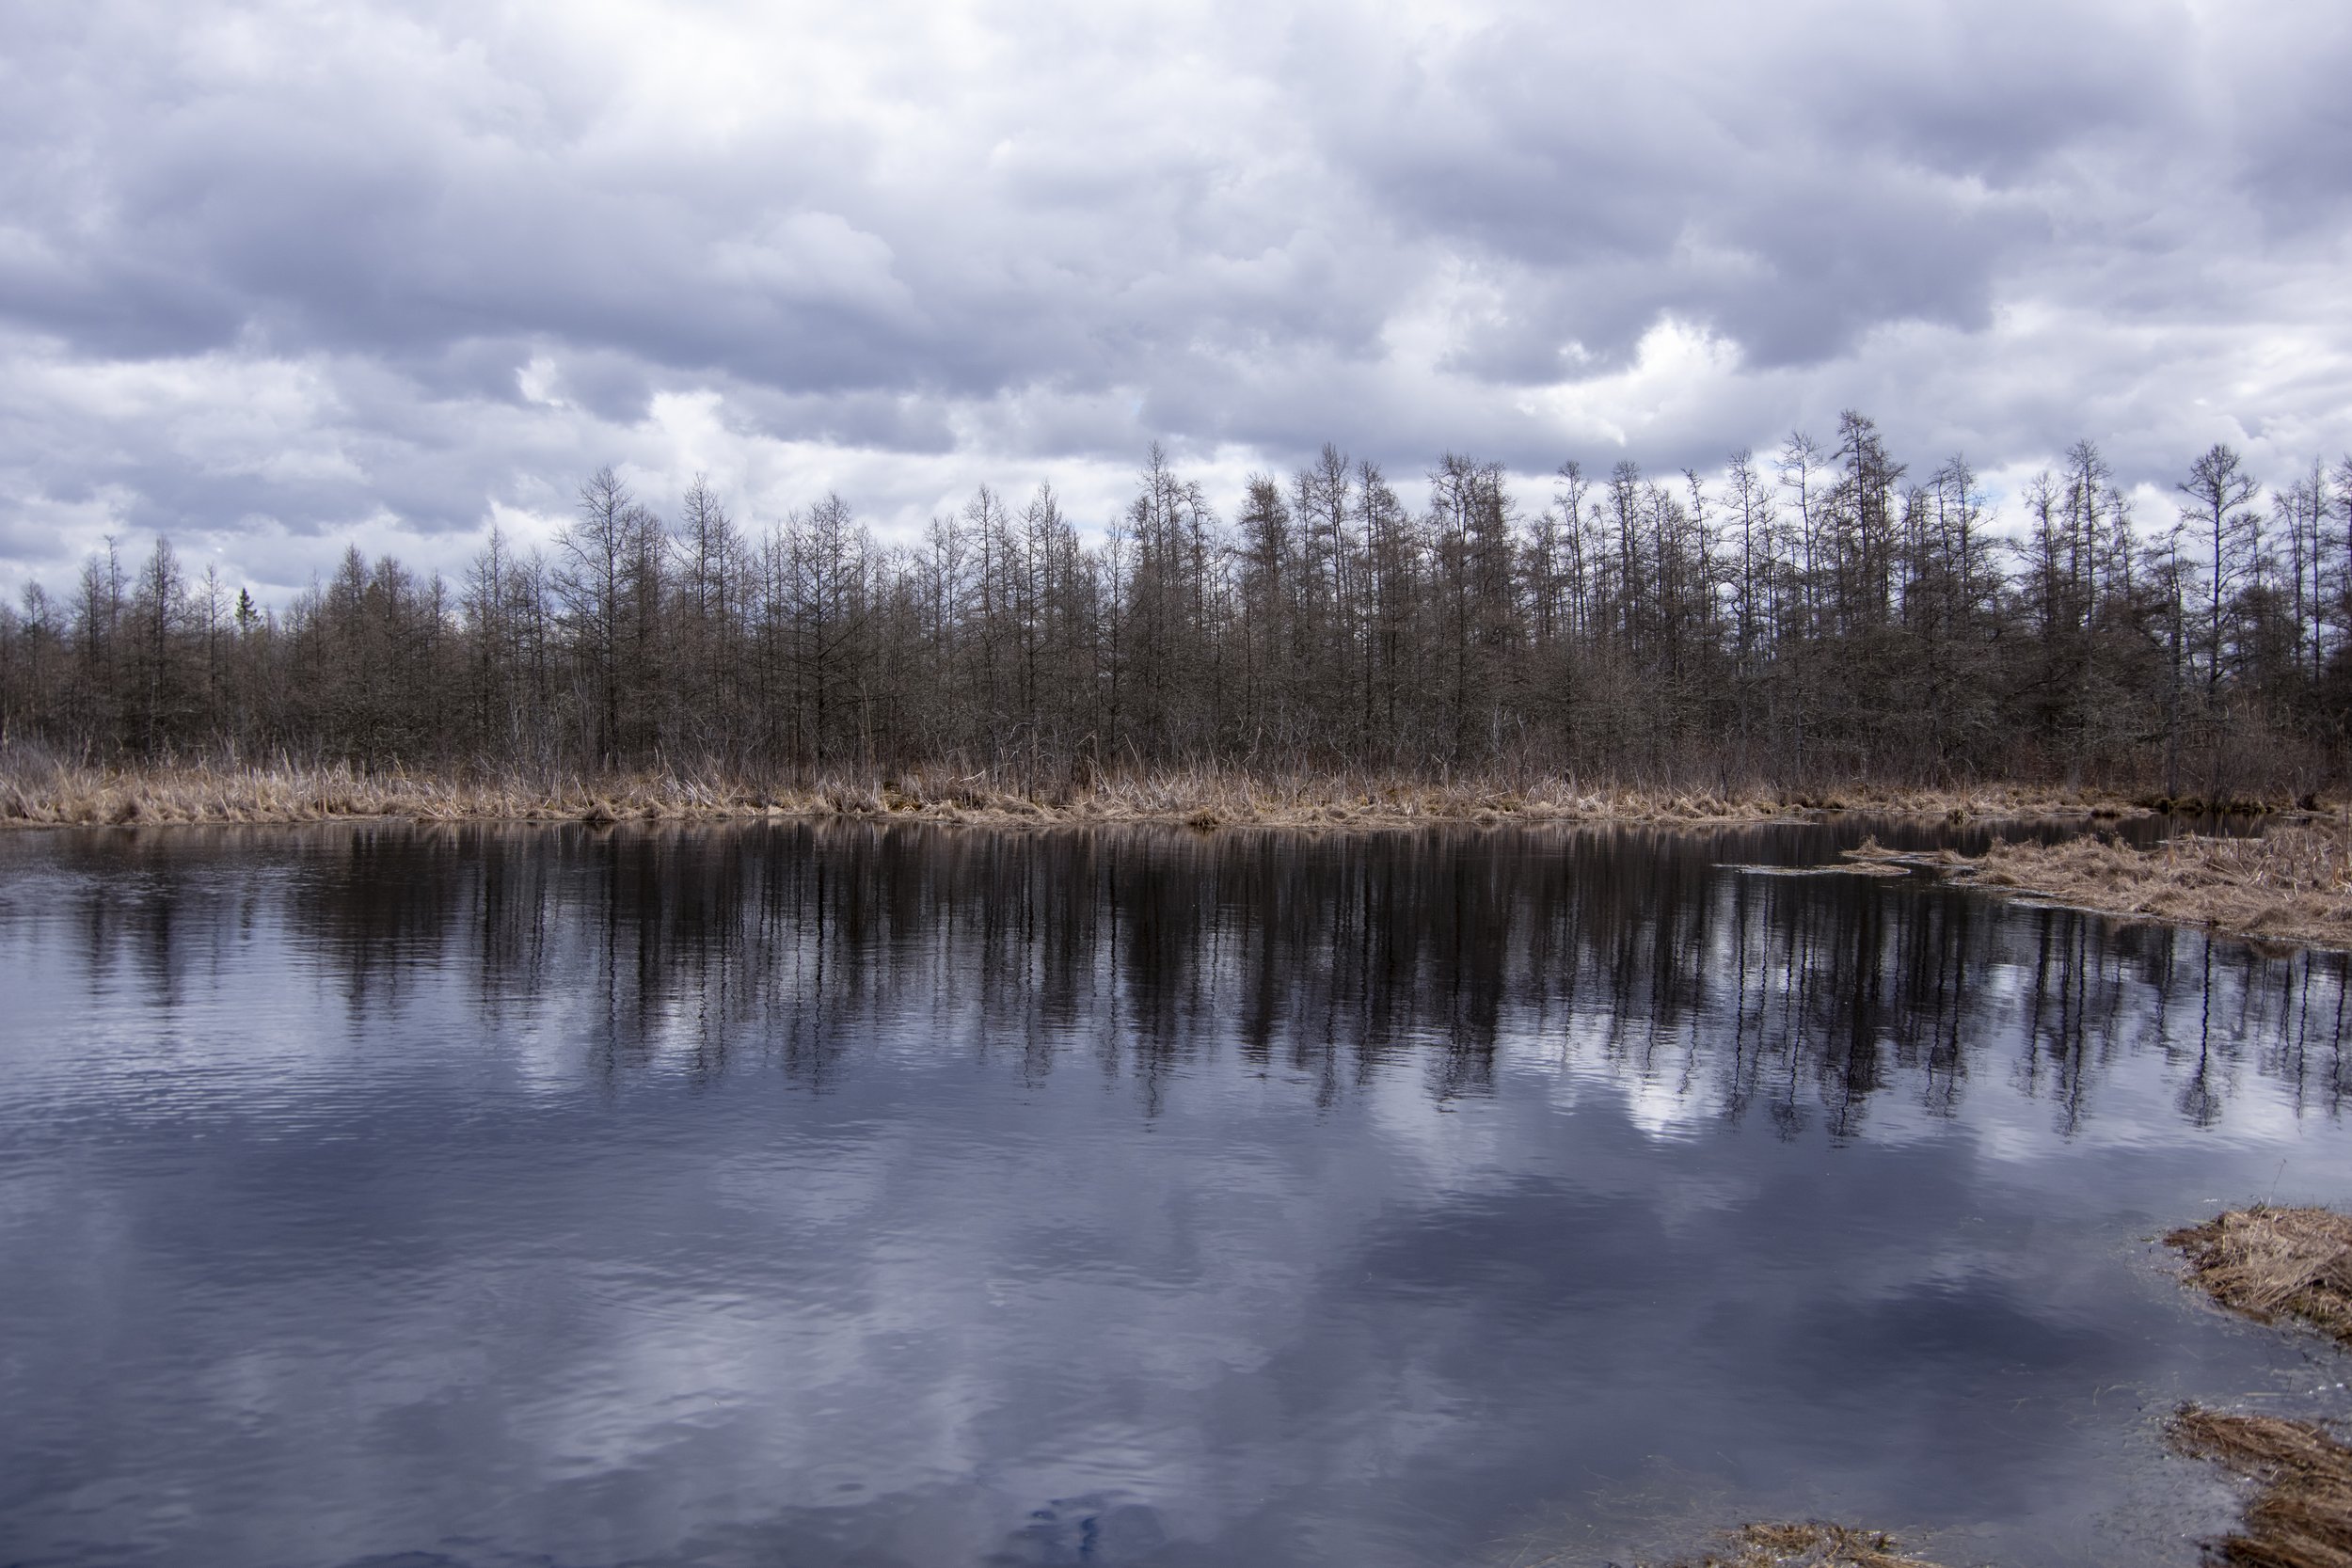
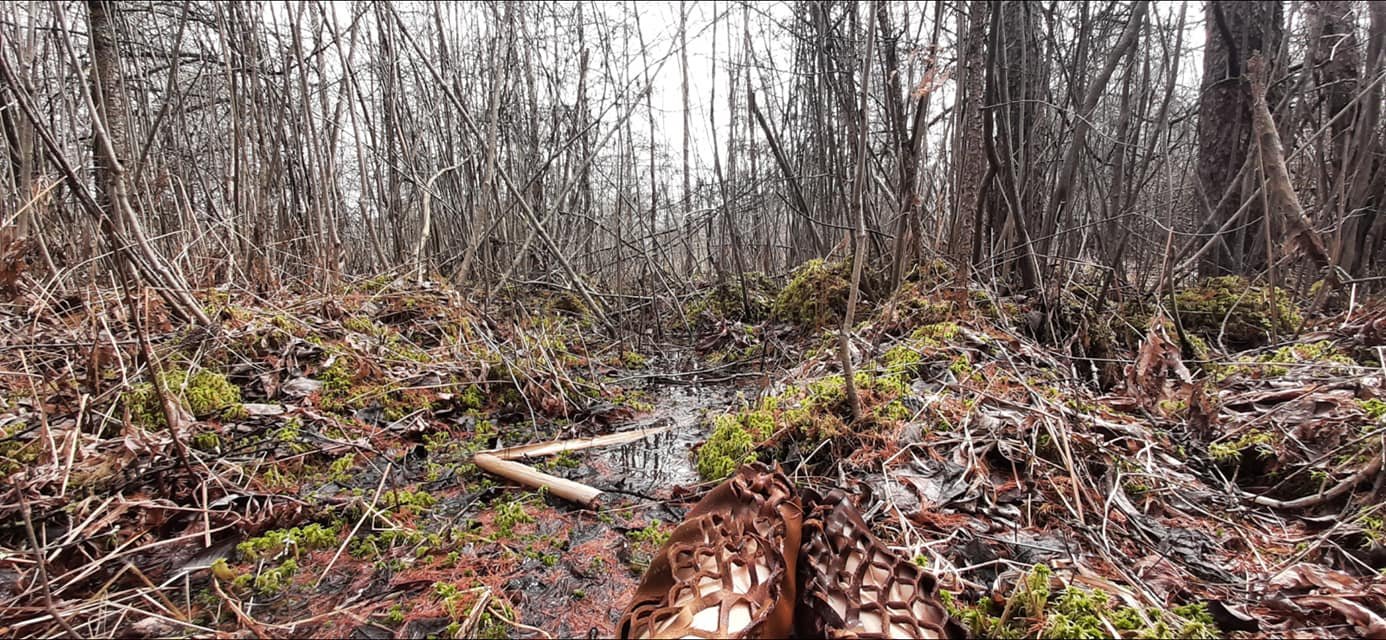
I would like to say here that they are surprisingly comfortable once they stretch out. They don’t protect from cold or damp, obviously, but they do protect from small stones, thorns, burrs, sticks, and so on. It’s a little reminiscent of a soft ballet shoe, but it obviously lacks that firmer sole and protection under the ball of the foot. Still, on a mild day in gentle terrain, it was actually fairly pleasant to walk a mile in Damendorf Man’s shoes. Since they held up so well, I think that I’ll condition them again and take them on a few more adventures.

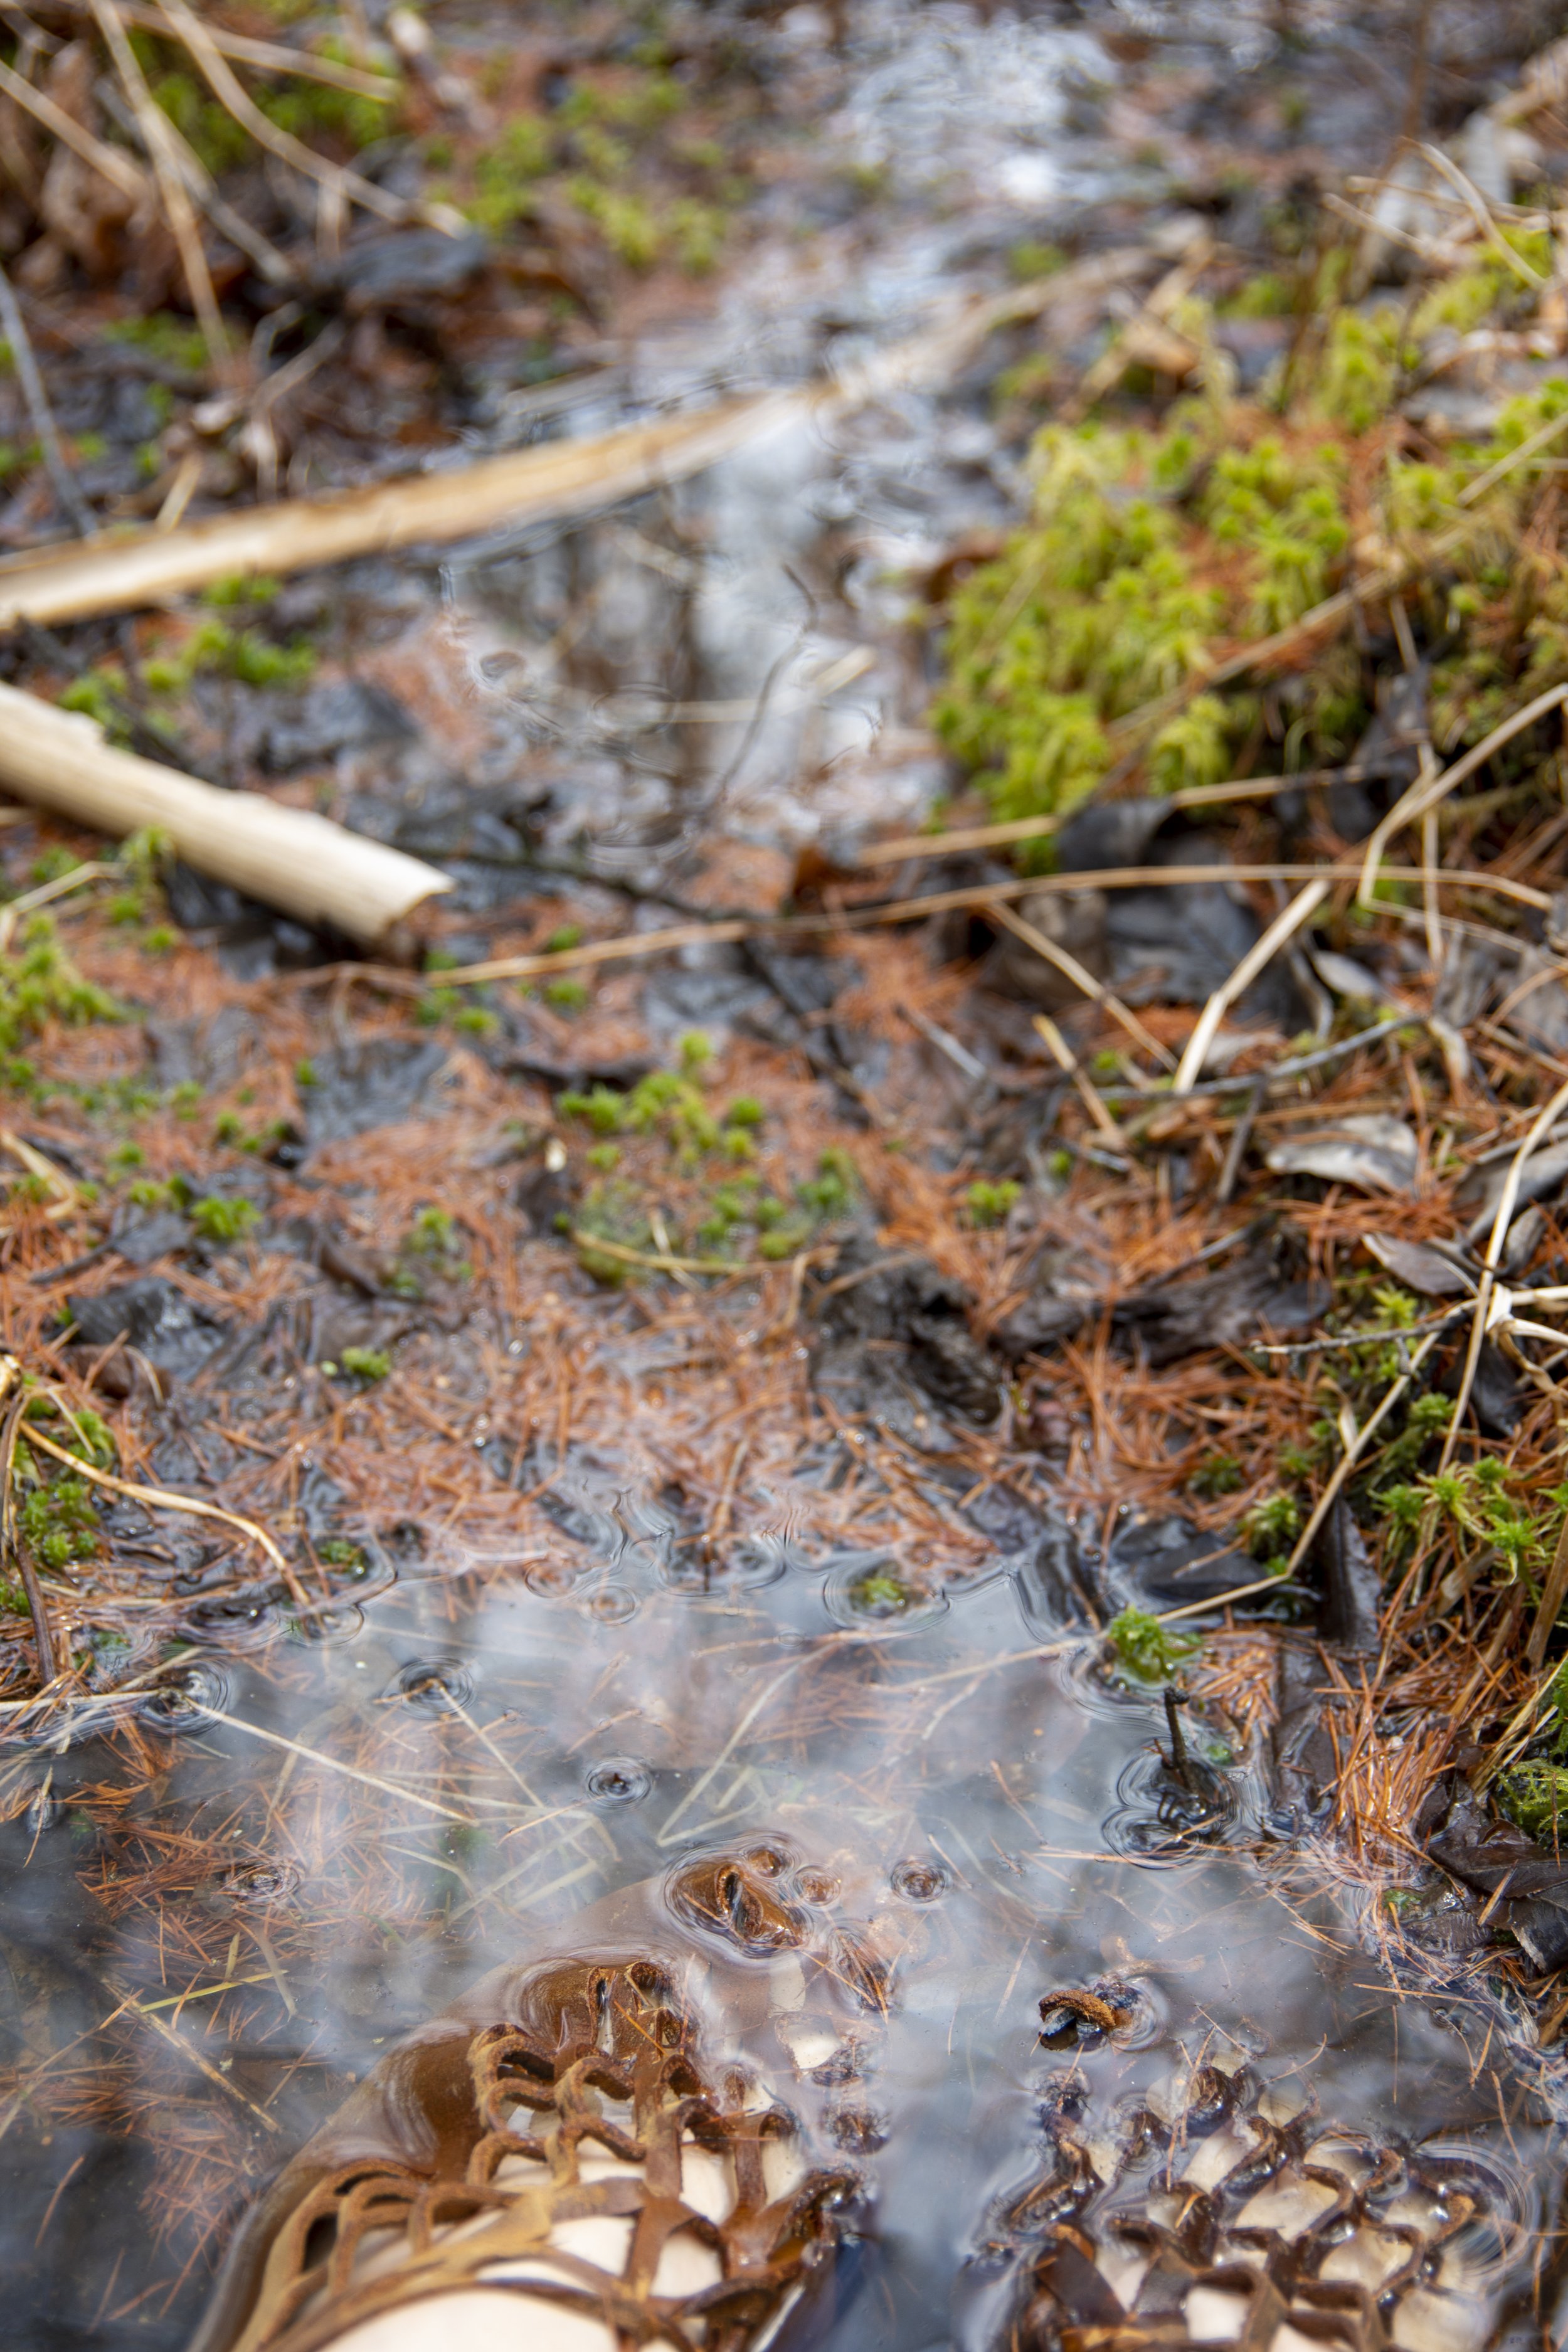
This is what they looked like after walking a mile and getting wet in them up to my ankles. Ready for a few miles more!
I had originally expected to spend a little time talking about process and a lot of time talking about how the visceral feelings of creating and wearing these shoes made me feel about iron age ancestors. The Moss Piglet prompt was, after all, about someone else’s shoes. Still, even after time to process it, I’m not sure that I have a good way to sum up the experience. There I was, cutting through tanned animal hide, trying to recreate the shoes of … of someone whose shoes remain. There’s so much that’s lost. Stories, languages, music, names. This man… I know nothing of his life but his shoes and leggings and belt and the peat bog where his compressed corpse was preserved. It was remarkable and magical to be able to trace the lines that created one item that I can know that we’ve shared. I paid careful attention to how the earth felt firm and warped beneath my feet, how the bog felt springy when I tested it with my toe, how the water felt cool as it trickled in. I wondered whether he felt that water coming in around his feet or whether he was dead before he hit the water…
But also…
You know… I’d googled the shoes.
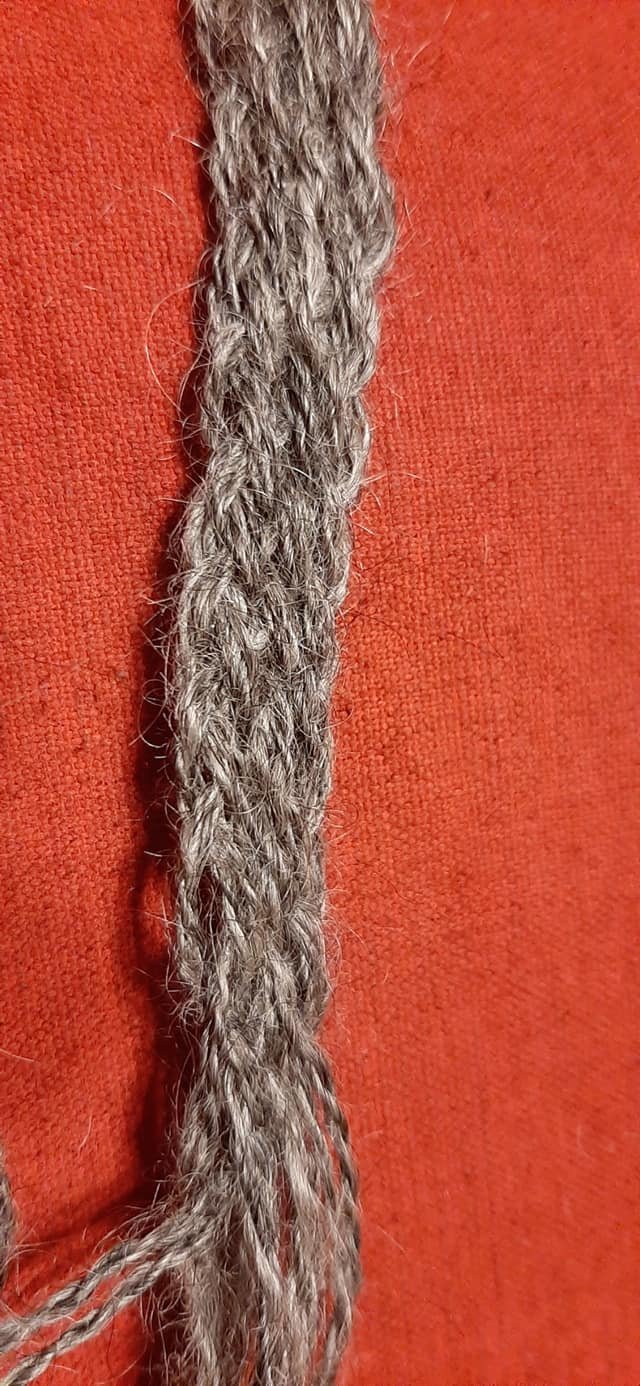
I mean… I looked at photographs that had been taken on another continent, and I followed a drawing made by some other internet user. I used a craft knife with a plastic handle and a cool, self-healing cutting mat. Sure, I had spun my own flax, but my spin-o-lution wheel is beautifully engineered. I didn’t even use a drop spindle for that. I drove to the bog in my car and took pictures on my DSLR and smart phone.
I did walk a mile in his shoes — and it was truly special — but I also have to keep it in perspective. You might think that this is minimizing it, but it’s not. When something is amazing and only a tiny glimpse into another life or world, keeping it in perspective reminds us that we have so, so very much more to learn and discover.
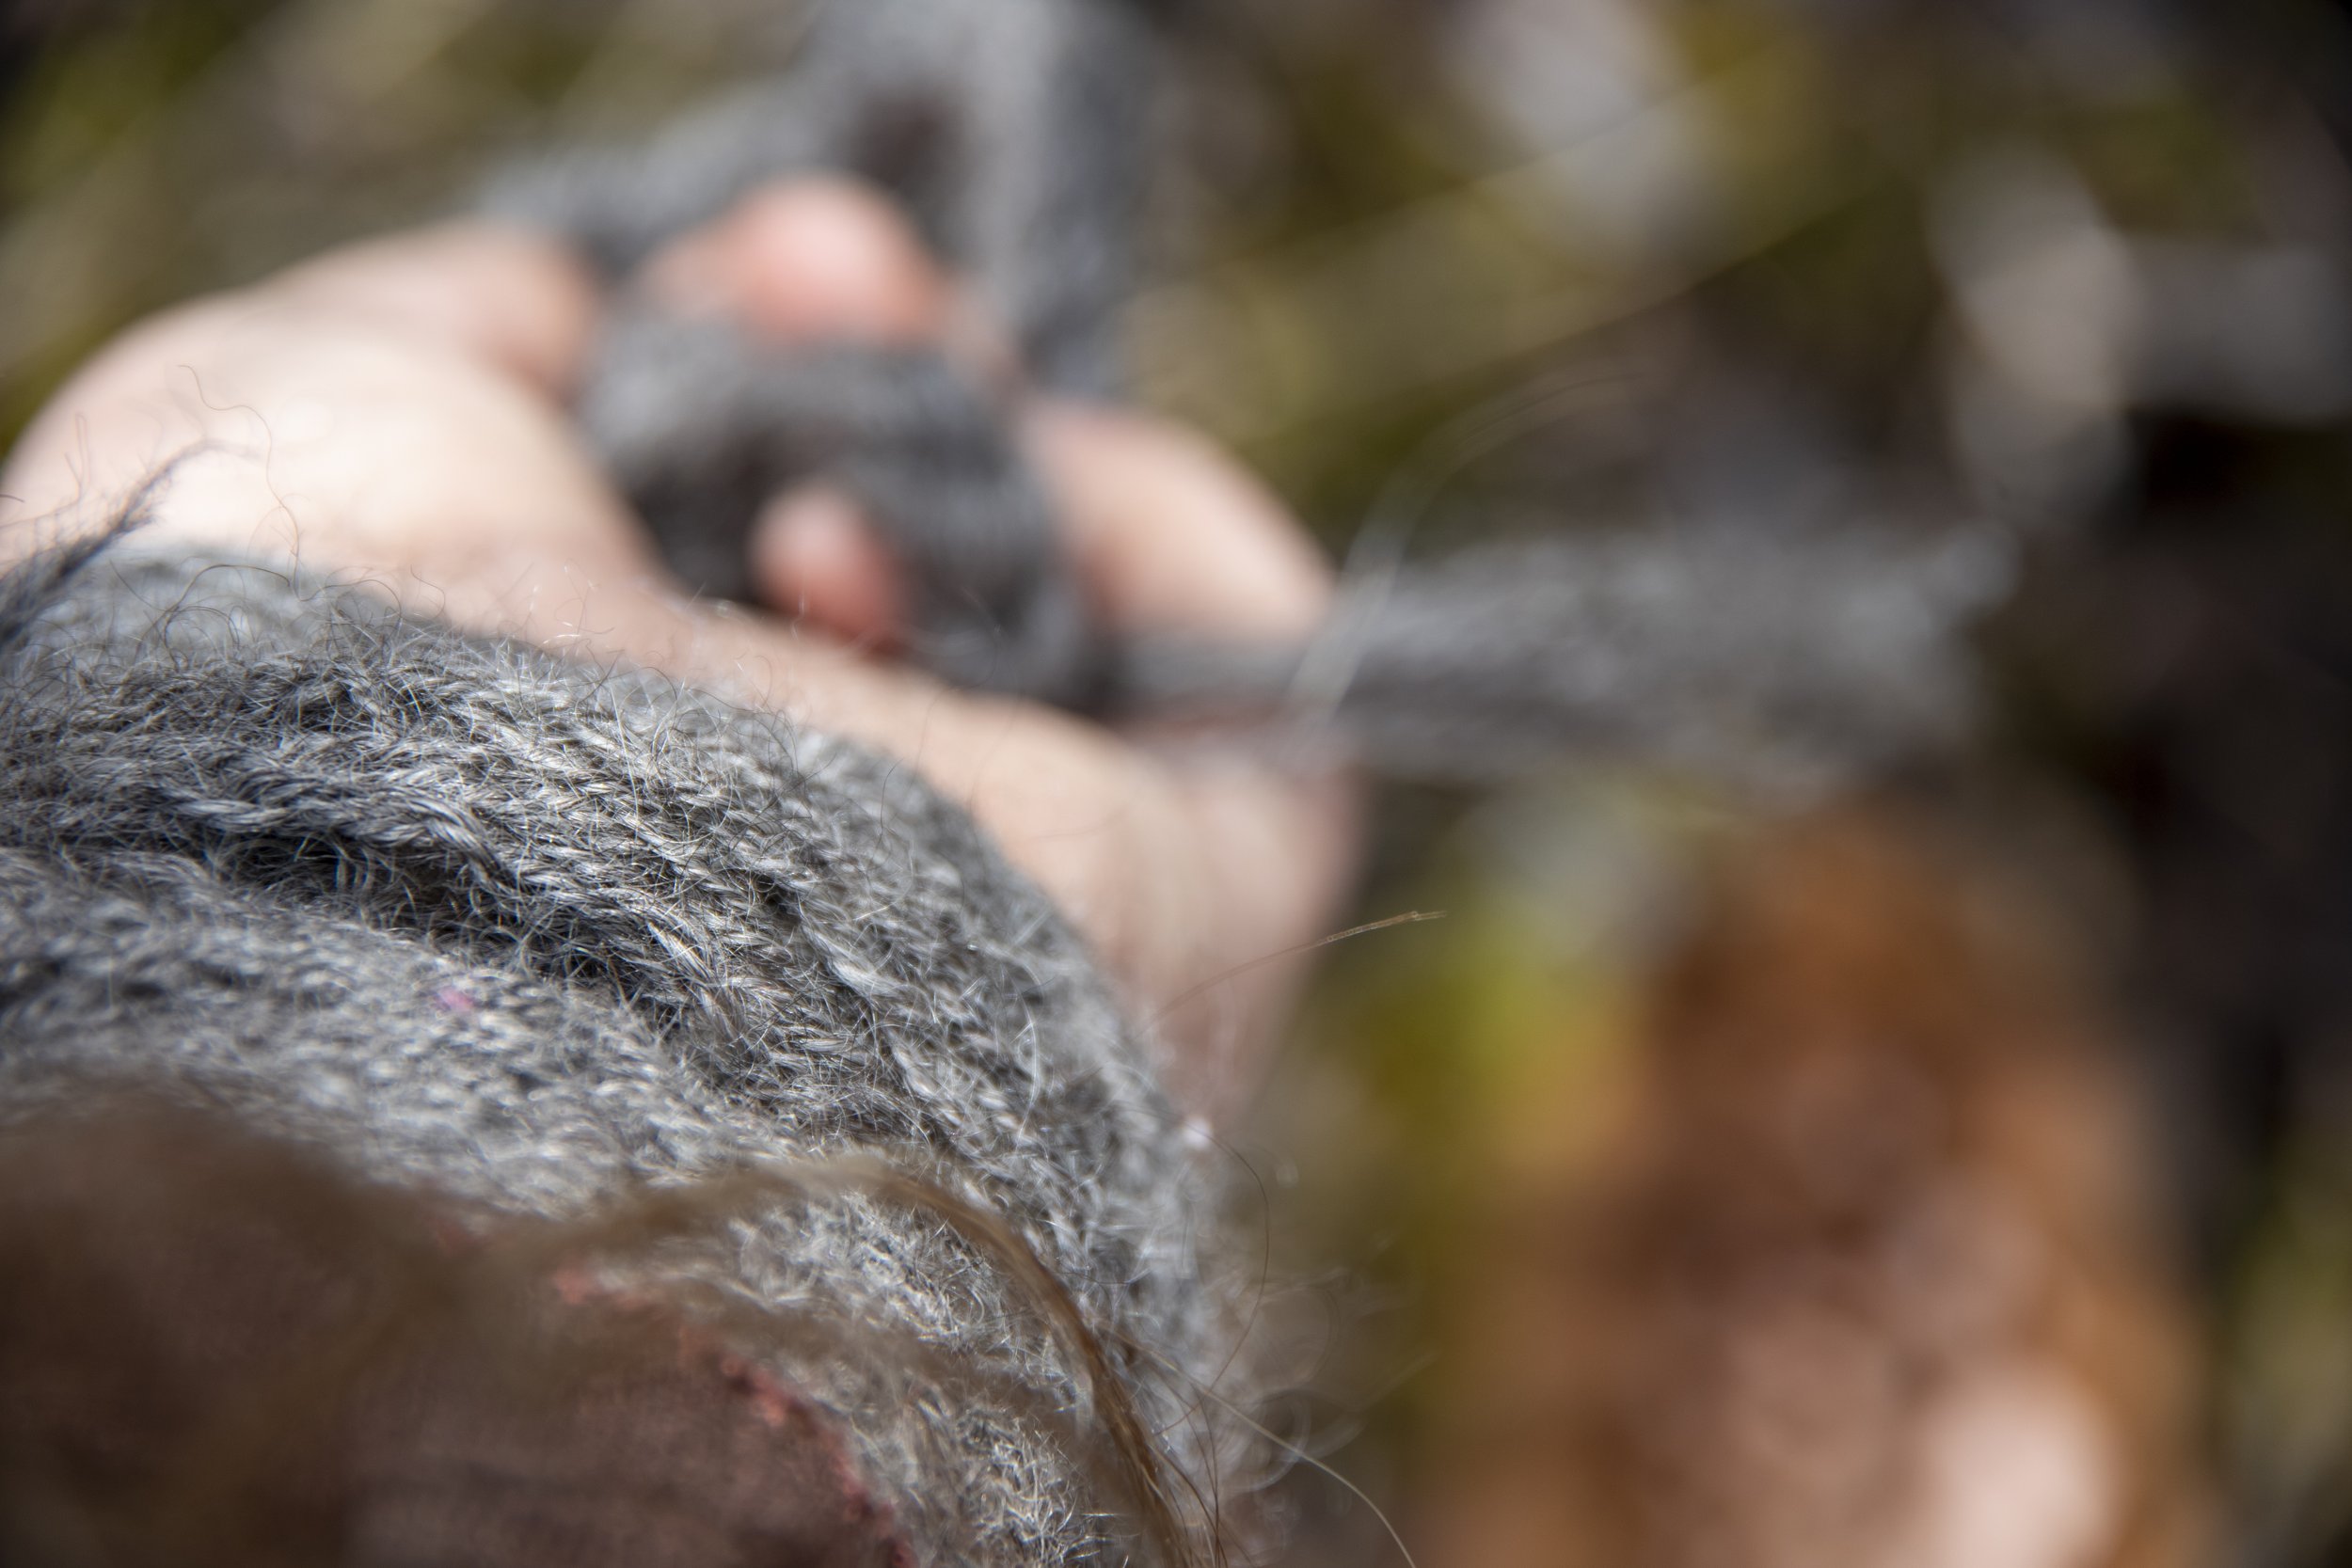
To that end, and because I just have to be me, I also tried my hand at some sprang weaving before I went to the bog. I wore some as a mini snood and some wrapped around my wrist. I can’t say that I’ve been terribly successful with it yet, but I am excited to learn more. It creates a lovely netting that offers interesting possibilities.


As for that little glimpse into Damendorf Man’s life, I’m not even sure what’s best to say about that.
Flesh of my flesh.
I kept thinking…
Flesh of my flesh
As I worked…
Flesh of my flesh
And…
Their hands, my hands.
Their work, my work.
Their cares, my cares.
Their life, my life.
Their death, my death.
Although it is but the most tenuous of threads, each of these crafts that I carry on is my hands following their hands. Some crafts may somehow be meandering but unbroken threads that connect us directly through the millenia, my fingers following theirs and those of their heirs. Other crafts are my grasping attempt to catch hold of something that will connect me back. Either way, it always, always strikes me as deeply human to touch and hold and value and learn from the things that were created by other humans who are otherwise lost to time.
Who twisted the cords for cordware, and what songs were they singing as the wet clay gave way under the pressure of their fingers and string and artistry? What were the names of the people who toiled to move and erect a single standing stone, and how did they feel when it was done? Whose hands — so much more skillful than my own — carefully cut through a tanned animal hide to make a pair of shoes 2,000 years ago? And could that artisan ever imagine that we’d marvel at their artistry after all this time?


(And did I need to rock up in a bog for a solo walk wearing a mishmash of clothes spanning a couple thousand years? Uhhh… No. Did I do it anyway? Uhhh… Yeah! Well, I am a Butter Druid, after all.)